|
| | Got some Wrenching done, finally! |  |
| | | Author | Message |
|---|
clint
| | Subject: Got some Wrenching done, finally! Sun May 23, 2010 12:51 pm | |
| Finally did some mods After spending 3 weeks recovering from the floods in Millington I was finally able to do some wrenching on the bike yesterday. Started off by mounting my Michelin AC10 onto the 17" front wheel with one that I got from Forrest at Wheeling Cycle Supply and I started the install of it on the bike. Then I moved on to the AIS removal, which turned out to be a big PITA. I didn't have any problems removing the plate on the front of the engine, but the damned metal gasket slipped off and went down into the nether regions between my engine case and skid-plate so I had to take the bike off the stand, loosen up the skid-plate, remove the gasket, tighten up the skidplate, and finally put the bike back on the stand before I could continue. Once that debacle was out of the way, I removed the AIS junk and found that my 1/2" vacuum cap was actually 5/8" and was mis-labled...so...here I am running around to all different kinds of stores yesterday trying to locate a damn 1/2" vacuum cap and NO ONE has one. Since my friends all describe me as the person least likely to realize there is a box, let alone think inside it, I stopped at Autozone and picked up a PCV elbow boot for a '79 Le baron (or some other weird Chrysler product) and used it, instead. Looks similar to this one, but new.  One end was 1/2" and the other was 5/8" I then grabbed the vacuum cap kit I had left over from my Kawasaki emissions removal process and took a 1/8" cap and put it into the next sized one and then into a 3/8" cap.  I put that into the 5/8" hole and used the hose clamp securing the OEM line to tighten it all up. It Works great so I doubt I'll ever buy a 1/2" cap. Once that crisis was averted, I then went about removing the OEM exhaust system so I could install my PBomb and Q4. As some may infer from previous posts, my last interaction with FMF left me with the strong impression that FMF stood for those "Fucking Mother Fuckers!!!" I won't go into it further except to say if you want to read my email to them over that incident, you can find it at: http://www.kawasakiforums.com/forum/showpost.php?s=59d110ffd513d7836d27caf015ea0082&p=353427&postcount=6 This interaction, however, proved far more satisfactory. The header installed easily, and without any blood loss due to the burs present on my KLX250S header. It fit into the Q4 easily, without the need to use a band saw, hammer, and file, and bolted right up. With the Exhaust taken care of, I realized I still needed to do the Flapper Valve modification, so I set about that process next. While the Yamaha is designed far better from a maintenance standpoint, the process of opening up the air box on my KLX was brain dead easier. Pull old boot out, insert boot from my old KDX, done. I spent entirely too much time, in my opinion, using the dremel tool to mod the Yamaha air box, and sealing it back up was nowhere near as easy as the Kawasaki. I am, however, satisfied with the job and it is well and truly "gutted" for the most air flow possible. That task complete, it was time to move onto the FMF Programmer. I placed mine under the seat next to the air intake for the air box and gave myself some slack to facilitate handling it while setting different modes. The OEM wire ties had enough slack to add the programmer wires to them so I routed them all neat like and, because I didn't have a helper to hold the gas tank while I fiddled around underneath it, I used a heavy duty Zip Tie to secure the tank to the handlebar crossbar, where it gave me plenty of access to work underneath it. The install went good, I heard both "clicks" when attaching the connectors inline, and then buttoned up the bike. I started the bike and the programmer lights scrolled back and forth a few times then the first green LED started blinking. (The red #8 was not blinking so I am assuming it installed correctly. If it didn't someone please let me know so I don't kill the bike, LOL) Anyway, I went and set the values I got from one of the posts here and the bike seems okay (haven't ridden it yet...kinda worried about the blinking green #1 LED above) I would have taken pics of the mod processes, but while I was doing all of this, I was also:
- Helping Karl rebuild the flooring on the front end of his pop-up camper so he could sell it,
- Talking with Karl's dad about his upcoming camping trip (his wife of like 45+years died 3 weeks ago and his camping trip is to scatter her ashes at all the places around the nation they saw in their trips while they were married)
- Fixing Karl's electrical run out to the garage
- Installing the Air Conditioner in the garage so working out there doesn't feel like you're sitting in an oven set to BROIL
- Repairing the Clarke 2.8 Gallon tank on Karl's KLX250S (my old bike) because the nipple connections on the tank leak. (So much for Clarke's "Guaranteed not to leak!" blurb concerning their factory seconds tanks...those bastards...Waiting to see if the JB Weld works
- Oh...also I forgot to bring my camera and left my Android at home...D'Oh!
| |
| | | | X-Racer

| | Subject: Re: Got some Wrenching done, finally! Sun May 23, 2010 4:51 pm | |
| Wow... You better sit down and have a beer.  | |
| | | | SheWolf
Alpha Rider

| | | | | greer
| | Subject: Re: Got some Wrenching done, finally! Mon May 24, 2010 5:30 am | |
| I slung airbox bits all over the place with the dremel. Sounds like you had a heck of a day.
Sarah | |
| | | | treeklimber
| | Subject: Re: Got some Wrenching done, finally! Thu May 27, 2010 6:28 pm | |
| So how does it run now?  | |
| | | | clint
| | Subject: Re: Got some Wrenching done, finally! Thu May 27, 2010 8:38 pm | |
| - treeklimber wrote:
- So how does it run now?
I ride the back roads to and from work, which are "hilly" for the Memphis area, and I'm a gear higher everywhere. I never shift down to 5th anymore for any of them. I just roll the throttle and gain speed up them now instead of shifting to 5th to maintain my current speed. Considering I'm 250+lbs in gear, accelerating up these hills is impressive. I've heard some say that the noise at idle with the Q4 is almost as quiet as the OEM at Idle but that is not the case. I have a good ear and it is definitely much throatier, though not obnoxious at all. I took it for a short spin this evening while waiting for the undercoating on my rack to cure/dry (which takes forever and a week in the humid air of Memphis) and was hoping to have the rack installed tonight with pics, but the damn thing was still wet an hour and a half after I sprayed it. I'll get more pics tomorrow. Here are some more pics https://2img.net/r/ihimizer/g/20100525201505.jpg/ | |
| | | | jason meacham

| | Subject: Re: Got some Wrenching done, finally! Thu May 27, 2010 11:43 pm | |
| Hello, I did pretty much the same mods to my WRR. what air filter did you use? what numbers are you using for your fuel progammer? now that I've modded my bike I love it, I plan on keeping it for a while.(unless yamaha comes out with a WR450r)  | |
| | | | Mr.Metal

| | Subject: Re: Got some Wrenching done, finally! Fri May 28, 2010 2:10 am | |
| Weird timing... I just did a lot of what you did, namely gutting the airbox and removing the AIS. My FMF setup is still en route, so I haven't done that or removed the EXUP. A side note about the air box gutting... you said you spent a lot of time with the dremel. My experience was... a bit different. Grinding down the rivets to pop the top of the airbox off proved to be the biggest challenge. I guess my grinding melted the plastic, because it was very difficult to get them to pop. The right side went fine, but I couldn't get a good leverage on the left side and ended up tearing off the rivets on that side. Doh. I didn't panic, though. So now that I had the top off, I looked at it carefully. The top is actually composed of two pieces, riveted together with more of those plastic bastards. So, I ground those down with prejudice and popped that bottom piece off. That got rid of the flapper and left me with a very clean, two-channel airbox. After a quick cleanup with the dremel, I saw no need to do anything else, as there was only a dividing wall left, the width of which cannot possibly make much of a difference. So, that's all it took to gut the thing. I actually cut the flapper into a nice little square and glued that over the top of the top part, where the silver puck used to sit. I put on a strip of black duct tape over that, just in case. Putting the top back on, I dabbed some Loctite brand crazy glue stuff on all of the rivet holes. I then pressed the top back on, and now it's drying overnight. Should be a solid seal. The AIS removal was pretty easy. I had the caps from Krabil's kit and I was careful not to drop the metal gasket. So, I lucked out there  Anyway, it's good to get some wrenching time after a shitty-ass day at work. | |
| | | | treeklimber
| | Subject: Re: Got some Wrenching done, finally! Fri May 28, 2010 3:53 am | |
| Nice to get all of that out of the way clint! Does it pull alot stronger than stock? - Quote :
- now that I've modded my bike I love it, I plan on keeping it for a while
obviously jason's must. | |
| | | | clint
| | Subject: Re: Got some Wrenching done, finally! Mon May 31, 2010 2:23 pm | |
| - treeklimber wrote:
- Nice to get all of that out of the way clint! Does it pull alot stronger than stock?
- Quote :
- now that I've modded my bike I love it, I plan on keeping it for a while
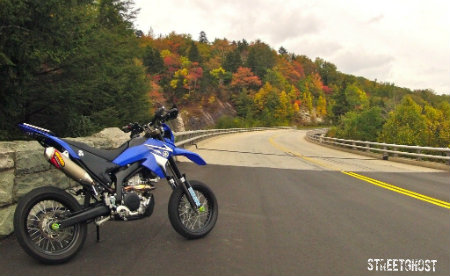
obviously jason's must. Yeah it definitely does pull stronger. I'm a gear higher everywhere, actually. Here are some more pics that I had in my phone and forgot to transfer over. Here's the "Dexter'd" Airbox  Here's the bike with the CoreTech Saddle Bags  Here's the space between the bag and silencer, thanks to the remounted heat shield  Here's the stand-off for the left-side saddle-bag  | |
| | | | malibu_dan

| | Subject: Re: Got some Wrenching done, finally! Tue Jun 01, 2010 11:59 am | |
| Your 'x' is looking awesome, Clint! Can't wait to see what you do next...  | |
| | | | clint
| | Subject: Re: Got some Wrenching done, finally! Tue Jun 01, 2010 1:32 pm | |
| - malibu_dan wrote:
- Your 'x' is looking awesome, Clint! Can't wait to see what you do next...
Dan, Thanks for the compliments! I'm waiting for the 18" Rear Wheel assembly to show up so I can put my Michelin AC10 on it and then get the SM tires re-mounted to the SM Rims. After that, the IMS Tank will just about complete the mods. (I have a set of Pro Taper bars from my YZ250 restoration that I may install if I can get them blasted and powder coated...) Did you ever try that little ride up through Meeman Shelby State Park? If you get up this way anytime soon, we should go hit Pig & Whistle sometime for some great food. | |
| | | | malibu_dan
| | Subject: Re: Got some Wrenching done, finally! Tue Jun 01, 2010 1:50 pm | |
| Let me find out what my son's schedule is over the next couple of weeks. We'll find an evening or a Sat to head up that way and you can show us around. We went to Trace State Park in MS last weekend, but the rain turned the Mississippi clay to slippery snot. | |
| | | | Sponsored content
| | Subject: Re: Got some Wrenching done, finally! | |
| |
| | | | | | Got some Wrenching done, finally! | |
|
Similar topics | |
|
| | Permissions in this forum: | You cannot reply to topics in this forum
| |
| |
| |