- M1A Rifleman wrote:
- Maybe you have installed before, but I could not get the f'n decals to work. I tried for hours and could not get rid of air bubbles and wrinkles. Never again will I try.
M1A,
I saw you had problems and sorry to hear it. Figure you know a lot of this stuff, but thought I'd put a little tutorial up for others who might not know the basics like I didn't. I'd done some big vinyl in bodyshops, but never over tricky cute compound curves - worse still when said curves are off angle from one another. It's tailor made for wrinkles and problems. Especially with the big one piece graphic for the 2009X. Stiff vinyl doesn't help a damned bit, either.
I recently installed the tank shroud ("air scoop") decals for a 2009X on some new black plastics.
I admit it; it was a royal PITA. The vinyl has to stretch 2 ways over opposing compound curves and the factory vinyl is not nearly as soft or flexible as some of the higher grade aftermarket vinyl.
I haven't done a lot of vinyl installation - particularly not the tough stuff. Suggest you read some online tutorials before next attempt. Here are some tricks I read online that helped and were barely enough. I'm sure I'm missing some details or misquoting some, but anyhow.
I used Rapid Tac "Cleaner and Application Fluid". But I'm getting the cart before the horse.
a.) Temperature: Try to do the install on your kitchen table or something so you get a temp of 75 to 85. Don't let anyone tell you to use a hair drier! This warning appears again and again on the web. Less dirt in the house than in the garage. This is a big factor.
1.) Clean the plastics like crazy. Careful not to scratch it; everything wants to scratch this plastic - even microfiber polishing clothes. I tried 70% isopropyl alcohol, but it was not removing the factory mold release. I tried 99% isopropyl rubbing alcohol from the drug store. This OBVIOUSLY and visibly stripped the thick layer of factory mold release off ASAP. Use body shop 2 clothes type method when cleaning with solvent.
2.) Cleaned the plastics again with 2 cloth method using the Rapid Tac.
3.) Keep the backing on the vinyl for now. Figure out where you want it and make 2 or 3 masking tape "hinges" so the vinyl can easily be flipped over backward or more importantly, into proper position.
4.) Get a professional vinyl installation type squeegee (2 x 3" if memory serves). Put a teflon non scratch sleeve on it. This will still scratch the butter soft plastics. Wuffie says to use a soft cloth in between when squeegeeing. I haven't tried that yet but will next time.
5.) Take one tack rag and use it on your person. Painters do this to try to "get the boulders" off themselves. Especially hair and upper body.
6.) Take a new tack rag and go over the taped on decal front and back. Tack off the plastic as well. Do it again.
7.) Remember to breathe.

Flip the tape/hinged decal up and peel off the decal backing. Spray the Rapid Tac Cleaner and Application Fluid all over the adhesive surface and the plastic, Be liberal about it. Filthy word, I know. But the point is, use a lot.
8.) Don't rush, but don't delay a lot either. Allowing the masking tape "hinges" to guide you, flip the decal back over and slide it around where you want it.
Opinions are going to vary on where to start squeegeeing. Most articles want you to start in the middle and work your way out in all directions equally. This failed repeatedly for me as the tough not flexible factory vinyl didn't want to stretch or cooperate in any way.
What I did instead when it was failing miserably and looking dangerous for ruining the decal: Lined things up again and squeegeed down the lower part over a single curve. Repeat a few times. At this point, the Rapid Tac was starting to get out of there and was allowing this area to take some REAL adhesion.
NOW I started working the squeegee up over the hump and into the valley or depression. I'd use some moderate force and get this area squeegeed down, then it would pop back up. I figured the Rapid Tac would eventually relent and start drying and it would stay put. So I repeated many, many times before it started staying stuck.
TIP: When it went on wrong and had a huge air pocket once, I just squeegeed over it again and thankfully the adhesion was still light enough to let it pop up again. End tip.
The way it kept popping back up suggested it would never stick properly, but that HAS NOT BEEN THE CASE.
Anyway, then after getting some adhesion in the depression, then I started squeegeeing up over the last hump. This was less challenging and dangerous but tried "gotcha" a couple of times. Checked for air and fluid bubbles. There were some. Squeegeed those out to the edges and this was sometimes difficult as the Rapid Tac fluid was by now drying or less present and the adhesive was fighting moving the bubbles. But they went. NO DIRT WAS under the decals, so I didn't have any
impossible bubbles from that.
This fight was so intensive, I ended up with some small scratches in the new black plastics. Fortunately, friends say I'm being way too picky about that and that they can't see the scratches at all. Graphics have long had this effect. The high contrast of the colors draw the eyes away from low contrast scratches.
I can see 'em, but I no longer care. The bike looks totally cool.
Second side graphic: I figured Murphy would get in there the second time around and I'd totally botch it. I thought maybe the way the first graphic kept popping back up might have been an anomaly; either the second side wouldn't do that or the first had something wrong. Not so. 2nd side went exactly the same way. Another excellent factory looking result! (IMHO, of course)
--Yet another reason ya' can't use a hair drier to soften the decal up: The Rapid Tac is a liquid obviously. Put liquid on a hot decal and 2 things happen:
The latent heat of evaporation would instantly cool the decal.
The word "evaporation" should be prominent in the line above. The Rapid Tac would "evaporate" way too quickly and there would not be time to get the decal on right.
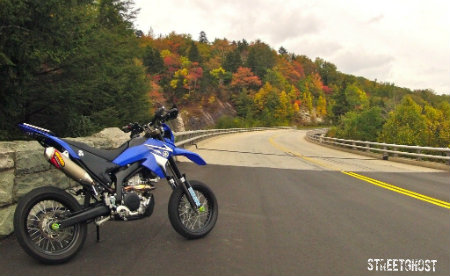
Hopefully some pro vinyl guys will hop in here with some clues on what I forgot or scrooged up. But the results speak. People think it's a factory 2009 WR250X. It is not; it was originally a blue bike.
Hope some of these ideas help someone. I figure I put this in here too late for M1A... and it might be a bit basic for his skill levels anyway.
To M1A: These things can be a bastige sometimes, can't they??
Anyhow, that's what I read and learned. I got a good result with the stiff factory graphics, but only "by the skin of my teeth".
Final word: If I EVER put that amount of money into factory graphics again, I'll probably have a professional vinyl shop put them on. But in the city I would have to go to (Pueblo, CO) they would almost certainly butcher the job. And then arrogantly expect me to pay for the botched result. That's how it is here.

Artoo


 I dont think that i am going to have a new one.


 I like that ! Lets hope for a resonable price.


 ) and a hair dryer or heat gun (careful with the heat gun because it gets hot enuf to melt your decals (and plastic!!) if you get too close on a high setting). I usually sit the decal in the sun or somewhere warm to make it more pliable and flexible when time to apply it, it helps immensely.
  Squirt the area with soapy water, apply your graphics where you want it...move it if you have to (hence the use of soapy water), then squeegee out the water/bubbles underneath, moving from the center of the graphics outward. Use the hairdryer in contoured areas where it will pop a bit...be patient and it will conform to the field you are working with. Just keep squeegee'ing out the water/bubbles until there isn't anymore. Hopefully you got them all out, but sometimes you'll get a stubborn one that refuses to be coaxed out. A small, sharp needle will fix that. Then run the hair dryer over it again, get it warm but not hot to set the adhesive. Rinse and repeat for the rest.

 More chances of screwing up the vinyl with a heat gun, IMO.