|
| | 2010 WRX rebuild |  |
|
+4mcdoudlehopper BLKfd3s wwguy Fiftygrit 8 posters | |
| Author | Message |
|---|
Djkham
 |  Subject: 2010 WRX rebuild Subject: 2010 WRX rebuild  Mon Feb 29, 2016 9:48 am Mon Feb 29, 2016 9:48 am | |
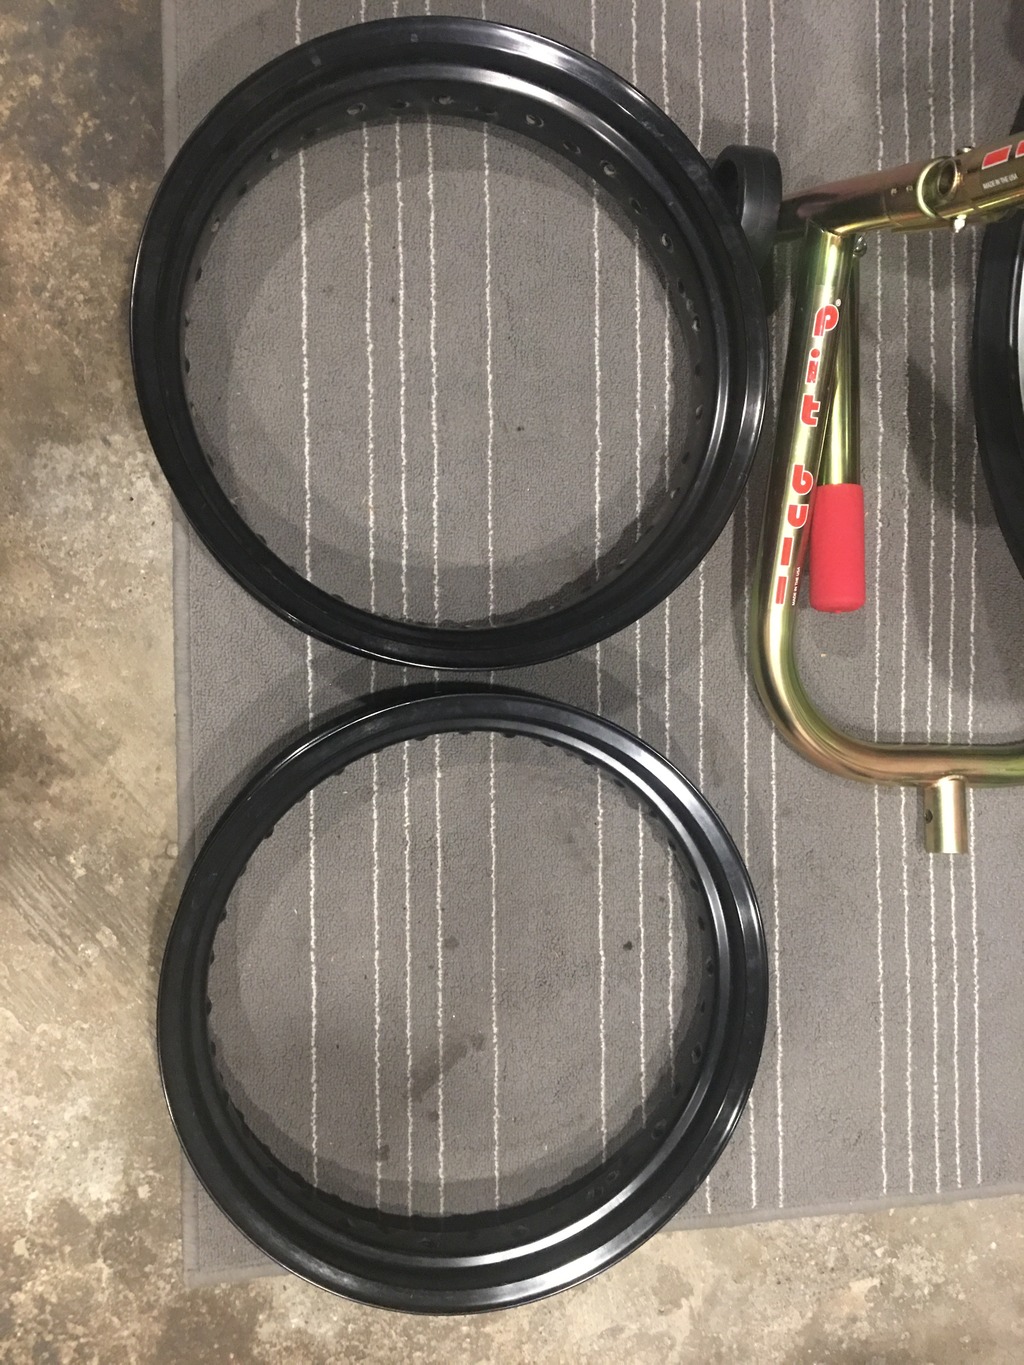
| Hello all. After quite a few weeks of reading and researching this bike and its potential, I found a good used WRX (had to drive 1000kms to pick it up...good used ones are pretty rare in these parts). The price was right but she was in need of some TLC so I've dedicated the next few months to rebuilding it into something unique without completely breaking the bank. Here's what I am starting with:  For the most part, the bike is in good mechanical condition. 9,500kms (6,000 miles) on the motor and it rides well. Bike has been dropped a bunch though and needs cosmetic love in addition to some routine maintenance where there has been some neglect. So here we go. Step 1: start tearing this thing down by removing damaged and un-necessary crap:  By the time I removed all the parts that needed to be cleaned, services, repaired or replaced, there wasn't much left:  Rims are getting refinished so unlaced them from the hubs and got them ready for powdercoating:  I spec'd this color for the rims (solid color -not the fade you see in the pic next to it which was part of the inspiration):  Plastics were all scuffed and grimey so took the secret weapon to them: mr clean magic eraser. Works wonders on motorcycle plastics:  Fork oil was 6 years old so figured I'd freshen it up. Started by pulling apart the fork:  Aside from being old and likely not having much of its viscosity/lubrication properties, fork oil was very dirty:  There was some rust here and there so did a little sanding and spot-refinishing (here's a before/after of the downtube in front):   Airbox was filthy so gave it a good cleaning and oiled up a K&N air filter:  There was some shady wiring done on her by the previous owner. One of many examples:  That's as far as I've gotten for now. Lots more to do and I'll post updates here if it can help anyone else who is planning a similar build/similar mods. | |
|   | | mcdoudlehopper

 |  Subject: Re: 2010 WRX rebuild Subject: Re: 2010 WRX rebuild  Mon Feb 29, 2016 9:54 pm Mon Feb 29, 2016 9:54 pm | |
| Off to a good start. The bikes are keepers so make it your own.  | |
|   | | Djkham
 |  Subject: Re: 2010 WRX rebuild Subject: Re: 2010 WRX rebuild  Tue Mar 01, 2016 9:49 pm Tue Mar 01, 2016 9:49 pm | |
| After a lot of tire research and referencing prices for what's available, I decided on the Pirelli Diablo Rosso II's. Have run them on a variety of bikes and they are solid. Front is a 110/70 and rear is 150/60.  | |
|   | | Djkham
 |  Subject: Re: 2010 WRX rebuild Subject: Re: 2010 WRX rebuild  Sat Mar 05, 2016 4:50 pm Sat Mar 05, 2016 4:50 pm | |
| Before lacing the wheels, I took a good look at the spokes and spoke nipples and they were in rough shape. I've got some black spoke covers for the spokes themselves but the nipples will still be visible so I broke out the California Purple Polish and put some elbow grease into them with good results. Before & After:  | |
|   | | Djkham
 |  Subject: Re: 2010 WRX rebuild Subject: Re: 2010 WRX rebuild  Sun Mar 06, 2016 6:54 pm Sun Mar 06, 2016 6:54 pm | |
| While waiting for the rims to get powder coated, I cleaned up the tail. Went with the DRC Edge smoked tail light and a set of Oxford Eyeshot LED turn signals. There is a kit for the Edge tail light where you can use it as an integrated turn signal but the light itself is small and I prefer to have really high-visibility turn signals so I went with separate pieces.  Zap-strapped wiring under the tail and the result is pretty clean.  | |
|   | | Djkham
 | |   | | Fiftygrit

 |  Subject: Re: 2010 WRX rebuild Subject: Re: 2010 WRX rebuild  Mon Mar 07, 2016 10:47 pm Mon Mar 07, 2016 10:47 pm | |
| Looking real good.  | |
|   | | Djkham
 | |   | | wwguy

 |  Subject: Re: 2010 WRX rebuild Subject: Re: 2010 WRX rebuild  Fri Mar 11, 2016 9:08 pm Fri Mar 11, 2016 9:08 pm | |
| Sweet! This forum needs a "like" button! | |
|   | | mcdoudlehopper

 |  Subject: Re: 2010 WRX rebuild Subject: Re: 2010 WRX rebuild  Fri Mar 11, 2016 10:33 pm Fri Mar 11, 2016 10:33 pm | |
| +1  | |
|   | | Djkham
 |  Subject: Re: 2010 WRX rebuild Subject: Re: 2010 WRX rebuild  Wed Mar 16, 2016 11:02 pm Wed Mar 16, 2016 11:02 pm | |
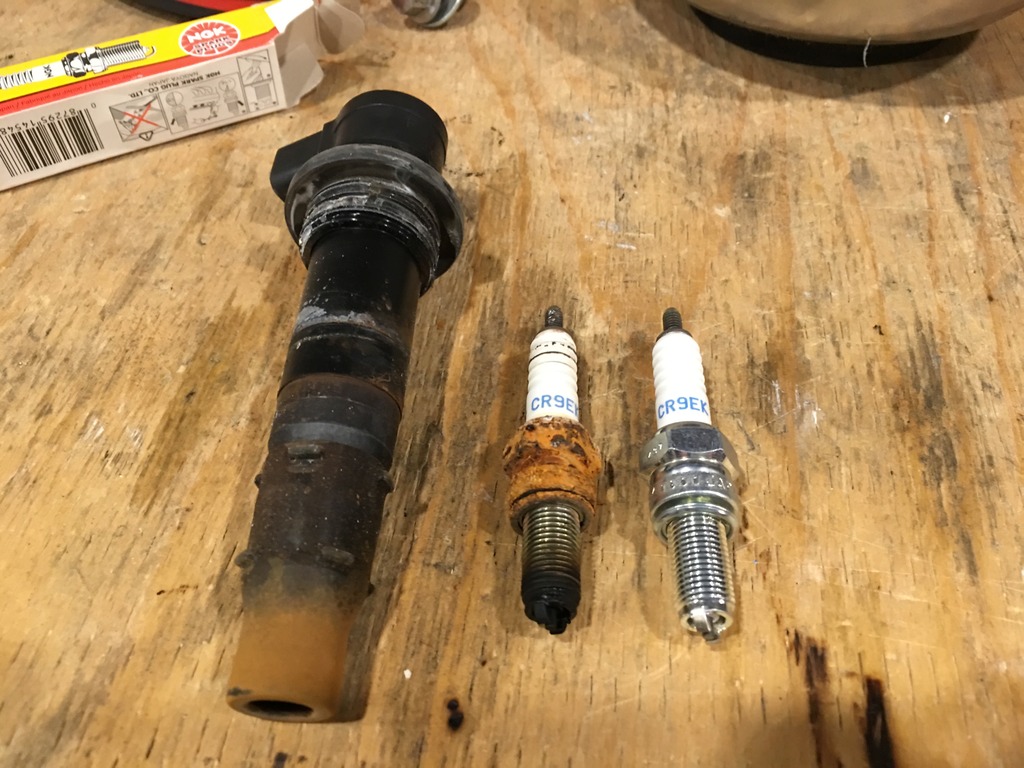
| A bunch of parts I had ordered came in this week so I got to work on a few more things. First, took off the old exhaust and replaced it with the much lighter, shorter and sexier Delta Barrel  Then, I took the tank off so I could change the spark plug and wire up the FMF Fuel Programmer. Didn't disconnect the tank...strapped it backward which worked well:  Now, I have to warn you that the following content if very graphic. Small children should be removed from sight before you see what the spark plug hole looked like:  And, as you can imagine, the spark plug didn't look any better. Here's a comparison to old vs new:  Anyway. Got that entire horror movie cleaned up and back together, then turned my attention to the front end. Got this Zeta Handguard kit with integrated turn signals:  Install on those was pretty straightforward and looks clean. I added some resistors to keep the flash rate down so it's just a bit quicker than stock now:  Then, I installed a set of convex mirrors inside the hand guards so they are pretty concealed but provide a really good view of what's behind me:  Last (for today anyway), I put a superwhite bulb in the stock headlight and bolted that up temporarily to see how it looks. Really happy with it so far:  I'm getting the wheels (with tires mounted) back from the guy who laced them so I'll put them on next, then gap the new spark plug, test the fuel programmer and Start working on decals and other loose ends. Stay tuned. | |
|   | | BLKfd3s
 |  Subject: Re: 2010 WRX rebuild Subject: Re: 2010 WRX rebuild  Thu Mar 17, 2016 8:28 am Thu Mar 17, 2016 8:28 am | |
| Awesome job job coming out nice. Can you please post a link to those convex mirrors please? | |
|   | | Djkham
 |  Subject: Re: 2010 WRX rebuild Subject: Re: 2010 WRX rebuild  Thu Mar 17, 2016 8:52 am Thu Mar 17, 2016 8:52 am | |
| Sure thing. The convex mirrors are about $30 and made by Powermadd:
http://www.powermadd.com/products/starseriesmirror.html | |
|   | | BLKfd3s
 |  Subject: Re: 2010 WRX rebuild Subject: Re: 2010 WRX rebuild  Thu Mar 17, 2016 8:59 am Thu Mar 17, 2016 8:59 am | |
| Thanks for quick response. How did you end up mounting them in the zeta's btw? | |
|   | | Djkham
 |  Subject: Re: 2010 WRX rebuild Subject: Re: 2010 WRX rebuild  Thu Mar 17, 2016 9:13 am Thu Mar 17, 2016 9:13 am | |
| - BLKfd3s wrote:
- Thanks for quick response. How did you end up mounting them in the zeta's btw?
I was wondering the same thing before I bought them but turns out it's really simple. Almost like they were designed to work together. If you look at the picture above where you can see the hand guard head-on, there are 2 bolts that go through the plastic guard and into the threaded metal handguard bar. The mirror has a single mounting hole in it so you can use either of the handguard mount holes with a longer bolt, put the mirror on there and then just throw a nut on the back to secure it. here's another pic that shows the back:  Since there are 2 holes, you have 2 options as either could be used. I'll have to ride the bike to see if my current configuration works and if not, I will move the mirrors to the outer holes. The mirrors are convex so they appear to give a pretty wide range of view. They also rotate 360 degrees so you are likely to find a configuration that gives you good viz. For $30, can't really complain. | |
|   | | mcdoudlehopper

 |  Subject: Re: 2010 WRX rebuild Subject: Re: 2010 WRX rebuild  Thu Mar 17, 2016 7:08 pm Thu Mar 17, 2016 7:08 pm | |
| Really like the 4barrel.  this would be the slip on of my choice but spendy $$ How does she sound? | |
|   | | Djkham
 |  Subject: Re: 2010 WRX rebuild Subject: Re: 2010 WRX rebuild  Fri Mar 18, 2016 7:32 pm Fri Mar 18, 2016 7:32 pm | |
| The next couple days are going to see a lot of wrench time so I can get this thing rideable. Here's the latest: So as it turns out, I may have jumped the gun on the Mirror placement. Did some A/B testing and turns out they were way better when moved to the outside mounting point. Here are some updated pictures for anyone thinking of doing this mod:   Next, I finished getting the stuff under the tank done. New spark plug went in fine and I got the FMF programmer routed to the battery tray where it can hang out for now:  The last thing left to do before starting to put things back together was to flush the coolant. I did this in a couple steps and it was easy. 1) Remove overflow reservoir and dump it, then 2) disconnect hose at bottom of rad and let that drain, then 3) blow into rad filler hole and get the last bit of coolant out.  Last, I applied the tank shroud decal to one side to get a feel for what it's going to look like:  | |
|   | | Djkham
 |  Subject: Re: 2010 WRX rebuild Subject: Re: 2010 WRX rebuild  Sat Mar 19, 2016 9:26 pm Sat Mar 19, 2016 9:26 pm | |
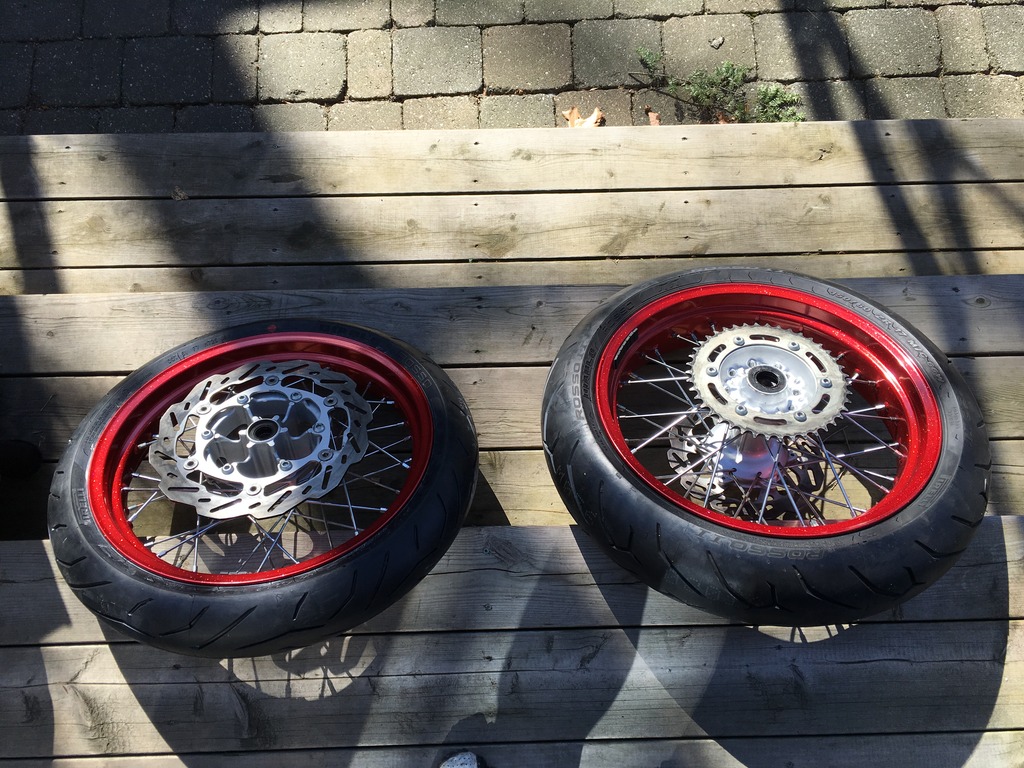
| Today was a good day. Finally got the wheels back from the lacing guy (a guy called Rosey Toes in Toronto who is a master of the dark art of correctly lacing motorcycle wheels):  Like I mentioned earlier, pics don't do this paint job justice but here is a better pic in direct sunlight where you can kinda see the metal flakes:  As much as I like them with just the bare metal spokes, I had my heart set of covering them in black so I spent the better part of 4 hours fitting a spoke wrap kit from a company called Bykas. It was a pretty serious PIA to get all the spoke covers cut to the right length, then fit them over each spoke (some spokes are pretty much touching each other so adding thickness to them requires some coaxing). Anyway, my fingers are shredded but I am loving the look of the wheels:   I also swapped in a new Renthal bar because the old one was busted up and I wanted something clean to look at from the cockpit:   Next up: putting the wheels on and takin'er for a ride! | |
|   | | mcdoudlehopper

 |  Subject: Re: 2010 WRX rebuild Subject: Re: 2010 WRX rebuild  Sat Mar 19, 2016 10:04 pm Sat Mar 19, 2016 10:04 pm | |
|  Cant wait to see the final result! | |
|   | | Djkham
 |  Subject: Re: 2010 WRX rebuild Subject: Re: 2010 WRX rebuild  Sun Mar 20, 2016 6:58 pm Sun Mar 20, 2016 6:58 pm | |
| Today was the big day. Got the wheels back on, did the oil and filter change and torqued everything to spec. Finally got to ride this thing and it is a total blast.  A few thoughts: 1) I'm using the stock settings on the FMF fuel programmer and the bike runs great. No stumbling at any RPM and pulls strong all over. I'll stick with these for now. 2) New brake fluid and the stainless brake line does wonders for this bike. The front is much more responsive now. For $85, I would say that's a must-do mod. 3) I've got the suspension set-up about half way between the "hard" and "normal" factory recommended settings and that seems to be a good starting point for my style of riding. 4) Those little convex mirrors work way better than I thought they would. Once they are adjusted, they barely vibrate and give a pretty good view of what's behind/beside you. They're a good mix of form and function although they don't provide as much viz as the stockers (work great, look terrible). I still have a few more cosmetic mods that are waiting for parts so will post pics when it's complete. | |
|   | | mcdoudlehopper

 |  Subject: Re: 2010 WRX rebuild Subject: Re: 2010 WRX rebuild  Sun Mar 20, 2016 10:02 pm Sun Mar 20, 2016 10:02 pm | |
| Very nice.  | |
|   | | dfoustou
 |  Subject: Re: 2010 WRX rebuild Subject: Re: 2010 WRX rebuild  Sun Mar 20, 2016 10:38 pm Sun Mar 20, 2016 10:38 pm | |
| Excellent!!! Great work and enjoy! | |
|   | | Guest
Guest
 |  Subject: Re: 2010 WRX rebuild Subject: Re: 2010 WRX rebuild  Mon Mar 21, 2016 11:55 am Mon Mar 21, 2016 11:55 am | |
| Bike has come together nicely, great work!
Considering the fine choice of products for your awesome build, I was curious what type and/or brand of spray paint you used for the downtube rust issue?
Living on the California coastline takes its toll on these hooligan hot-lappers...I'm pushing 35,000mi now, she's an old salty dog!
Btw thanks for the input on the rims/spokes/lacing cleaning and refurbishing-awesome detail work. A must-do for my salty spokes!
|
|   | | Djkham
 |  Subject: Re: 2010 WRX rebuild Subject: Re: 2010 WRX rebuild  Mon Mar 21, 2016 12:22 pm Mon Mar 21, 2016 12:22 pm | |
| - Surfer-X wrote:
- Bike has come together nicely, great work!
Considering the fine choice of products for your awesome build, I was curious what type and/or brand of spray paint you used for the downtube rust issue?
Living on the California coastline takes its toll on these hooligan hot-lappers...I'm pushing 35,000mi now, she's an old salty dog!
Btw thanks for the input on the rims/spokes/lacing cleaning and refurbishing-awesome detail work. A must-do for my salty spokes!
No problem at all. WRX'ers gotta stick together. On the paint side, I tested a few different matte paints and netted-out on the Rustoleum Matte Black automotive stuff. Matches and blends quite well with stock frame color. I've used it on trailers before and it held up well: http://www.rustoleum.com/product-catalog/consumer-brands/auto/specialty-paints/matte-finish In terms of prep, I did a basic spot-sanding job with 3 progressively finer grits of sandpaper (stared with a sanding block). That rust paint is pretty versatile stuff so you can probably get away with more. Well worth a little prep time though so you don't end up with the stuff flaking off after a few rides. For the metal polishing, I gotta put in a good word for California Purple Polish. There's about a million types of different metal polishes out there but from all those I've tested, this stuff does the best job, time after time: http://www.californiacustom.com/purple_metal_polish.html Good luck with your ol' salty! | |
|   | | Djkham
 |  Subject: Re: 2010 WRX rebuild Subject: Re: 2010 WRX rebuild  Fri Mar 25, 2016 8:25 pm Fri Mar 25, 2016 8:25 pm | |
| I'm still waiting for the new (white) right side tank shroud panel and swingarm decals but low and behold, a special delivery from China arrived...  Now, I know what you're thinking... "That Chinese stuff is crap" and I somewhat agree with you. I've bought my fair share of discount Chinese parts and have gotten burned enough times. The reality is that certain parts from China can actually work quite well, but you have to know what to look for. For example, anodized parts (such as levers) will usually fade within the first year. It's one of the cost-cutting measures -they do cheap anodizing that doesn't hold up. So, your black parts turn copper, red ones turn pink, and so on. Nothing looks worse on a bike. The solution: buy parts in silver! That way, there is no anodizing -just CNC'd aluminum and you're good to go. I've had silver Chinese levers on other bikes for years with no problems. Install on these was a breeze and I'm looking forward to seeing how I like the shorty levers. Heck, for $30, if I don't like'em, I'll throw the stockers back on. Here's the difference between stock and fleabay levers (seller is "digital2brother"):  Here's how they look on the bike:  | |
|   | | Sponsored content
 |  Subject: Re: 2010 WRX rebuild Subject: Re: 2010 WRX rebuild  | |
| |
|   | | | | 2010 WRX rebuild |  |
|
Similar topics |  |
|
| | Permissions in this forum: | You cannot reply to topics in this forum
| |
| |
| |
