|
| | Start of the next (1st?) major upgrade. |  |
|
+10zestymac mel22b miniceptor86 rsteiger pbnut ACDSWRR Rusty Shovel Biglake f1isbest LordEndo 14 posters | |
| Author | Message |
|---|
LordEndo

| | Subject: Start of the next (1st?) major upgrade. Sat Apr 06, 2013 1:42 pm | |
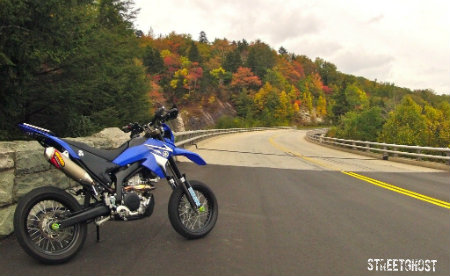
| I've had my 2012 WR250r since last fall and have been doing a lot of tight trail riding with the DSBC group in Chilliwack. Of course....I've been surfing various mods and farkles since the beginning. Shortly after picking the bike up; - Acerbis hand guards - Flatline skid plate and rad guard - Sandman case saver - Pirelli MT-21 front and rear - bar end mirrors mounted under bar - Giant Loop Mojavi bags - Pigtail for trickle charger Then after a few cold rides and a solid crash down a ravine; - Protaper Contour bars (RM Bend) - Symtec grip heaters (tied into headlight feed, work great - but need to insulate clutch side still) - Righteous stunt metal two finger clutch lever (disabled clutch switch) And more recently; - Seat Concepts low rise seat - Opened up the fork protectors to stop damaging the fork (heat gun) - 12t front sprocket (such a requirement if you're in tight trail) - Started carrying a small compressor to air up and down (no trailering for this guy!) Now.....over the last few days I've finally caved. I'm of the opinion that our WR250R's are the ultimate do everything machine. In current form it's a damn fine trail bike, but not adventure riding ready. I want to be able to go on the long distance off road rides with my big bike buddies and still hit all the fun little trails on the way. So....have ordered; - Safari 3.7gal tank and anti slosh packing (really appreciate the discount ADVRIDER at justgastanks.com) - Bought a used GYTR fender rack off a forum member here - Rotopax 1 gal tank - FMF - Q4 exhaust - Powerbomb header - programmer - fender eliminator kit and little turn signals from SRmoto (haven't installed yet, had these for a while....) - Giant Loop Coyote bag with the extra 8L dry bag - Camping stuff from MEC (Hennessy hammock, MSR stove, folding chair, miscellaneous stuff) I figure if I'm taking the tank off then it's time to do the AIS removal, Air Box mod, EXUP removal. And....since I'm doing that I bought the FMF stuff to do it up right. I'm still debating the whole 12/43 vs. 13/47 and a new chain thing - would loose a couple more pounds apparently in the rear sprocket. That and a light weight battery. Ultimately I want the bike to weigh the same with all the add-ons and the extra gas. By what I've dug up in the weight reduction thread this should all work out pretty much bang on including a full Safari tank (not including camping gear and the giant loop bag). Will post some pics - no point in doing detailed install pics as there's so many good ones out there already. I'll post up any difficulties or changes I come across. Current Form:     
Last edited by LordEndo on Sun Apr 14, 2013 11:14 pm; edited 2 times in total | |
| | | | f1isbest

| | Subject: Re: Start of the next (1st?) major upgrade. Sun Apr 07, 2013 12:14 am | |
| looks like your on a good track. Keep us informed.
Bob | |
| | | | LordEndo
| | Subject: Re: Start of the next (1st?) major upgrade. Sun Apr 07, 2013 3:06 am | |
| I sure am thankful for everyone posting their examples. Makes it easy! (er) | |
| | | | LordEndo
| | Subject: FMF Powerbomb and Q4 Install Fri Apr 12, 2013 4:39 pm | |
| Last night I removed the old exhaust, EXUP servo, and installed the Q4 and Powerbomb. I haven't seen a lot of posts about fitment issues though the one I did find described it well - good fit but not great. Here's some pics and info; Powerbomb - 044269 Q4 - 044270-71 (I'm not too sure about this part number. FMF Spec's 044271 for our bike but it looks like this could be mounted to either side perhaps for another bike?) I'm a bit disappointed in the fit, but I'm probably being anal - everything is within a few mm. Specifically I'm talking about fitup at the exhaust port, fitup at the mid bolt, and fitup at the fender support. The stock bolt isn't really long enough (maybe two threads) to install the Q4 on the outside, and required a bit of force to put it on the outside. It fits well on the inside though.  The mid support bolt that FMF supply is flat out too short by at least 6mm (1/4"). I used a longer one I had kicking around with a washer, a lock washer, and then ultimately another washer on the inside. The issue being that the 'dent' in the pipe that is supposed to clear the passenger footpeg rest doesn't quite lineup. In this picture you can see that it touches but not obscenely so. But I worry a bit about heat transfer.....  Last thing I'm a bit surprised by is that the header doesn't fit really even close to the ID of the exhaust port. It mates up to the flange fine (same pipe OD as the stock, or maybe 1mm less). I didn't snap a pic of this - last pic is overall install.  Off to buy a resistor or two now and get the programmer installed and the servo bypass..... *Update* Finished the airbox mod and inserted the resistor after installing the powercommander. No leaks, no codes (8.2k ohm). Wow it's loud. This is the quietest can out there? Sounds awesome though and throttle response is super crisp - haven't even setup the programmer yet! | |
| | | | LordEndo
| | Subject: Everything installed! AND it works!! Sun Apr 14, 2013 10:41 pm | |
| Next day - first thing I got onto opening up the airbox a bit. I did HighFive's ultimate airbox mod - which is pretty much removing the flapper and taking out the inside snorkel bit (if you want to call it that). This makes more room in the air box, but back in the Motox days we used to drill more holes into the airbox to increase flow. If you get into doing this mod, after removing the flapper just knock the snorkel part into the air box - use a bit of wood (hammer handle) and a couple of light taps snaps the plastic rivets. Next was the AIS removal. All went without incident but I haven't managed to make up a plate yet to replace the tube. For now, a bolt and some clamps will do the trick. Then I fixed up the exhaust mounting. I didn't like the inside mount of the can as it'd probably hit the rear tire when fully compressed. It just took shaving the tiniest bit out of the corner of the passenger footpeg mount. If you're going to install this setup plan on doing this first - not worth messing around and the aggravation - dremel with the black metal cutting disk worked great and then sand it all smooth. So now I start playing around with the programmer settings. It's great that there's so many adjustments on the FMF unit but regardless of what I tried, the stock (default) settings seem to work best. I tried HighFive's settings and then took it for a ride and only made it a few blocks - felt terrible. I'm not sure what's different but then I switched back to the default and wow......what a difference. These mods are a massive change over stock - the bike is way faster and revs out faster.....I was actually hitting the rev limiter between the increased performance and the lower sound. Tomorrow will tell the tale though - fresh oil change, cleaned the air filter and it'll be into the trails at Church mountain in Chilliwack. Some pics..... Ready to start removing stuff.... 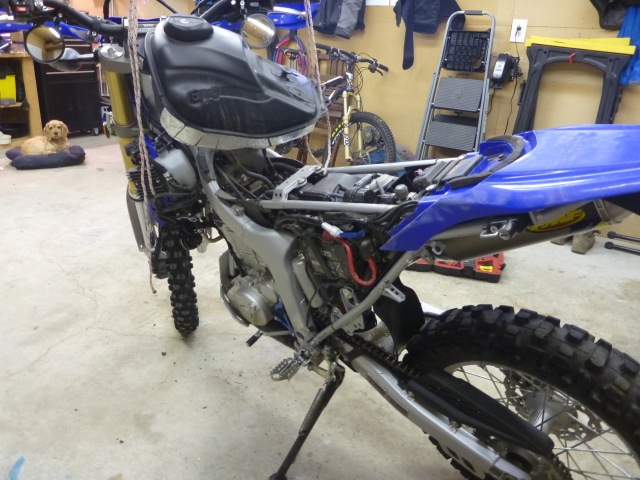 The black accumulator, the solenoid, valve (silver thing on the airbox) and the flapper in the airbox are all gonna go. 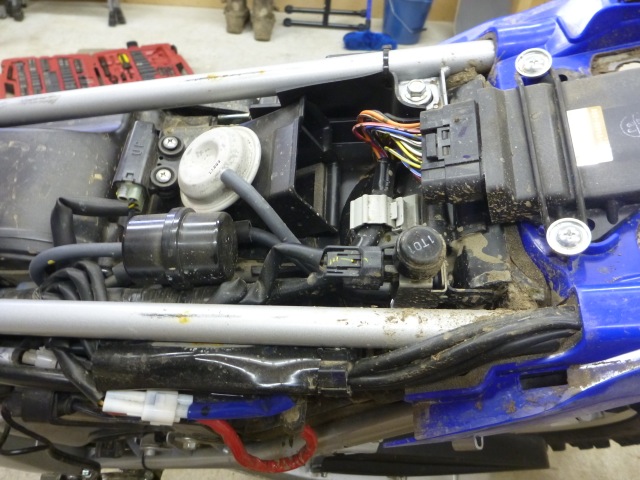 Here's the hole after the solenoid is removed to just 'pop' the 'snorkel' bit off.  Inside the air box 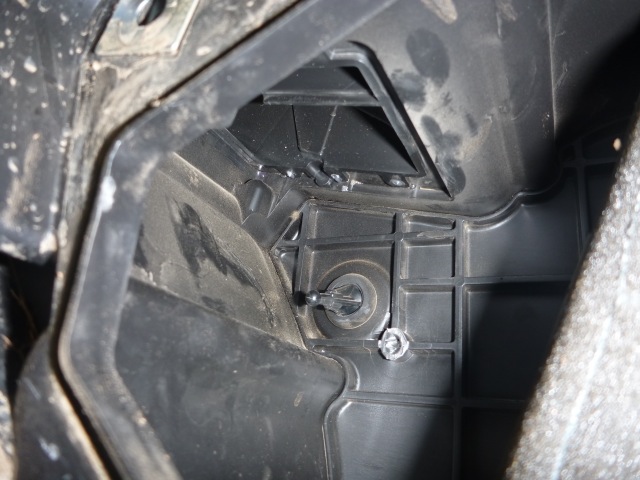 Programmer mounted.....off topic - where do you buy a simple piece of plastic!?! I guess at a craft store? Tough to find.....I bought a thin clipboard for $3 and trimmed a small piece out of it to glue over the hole and mount the programmer to. 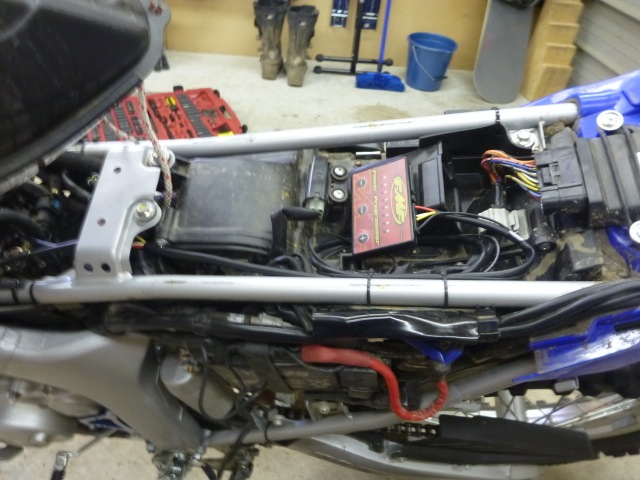 Going to fab a plate.....how long do you think the bolt will last? Probably forget it and leave it there forever......  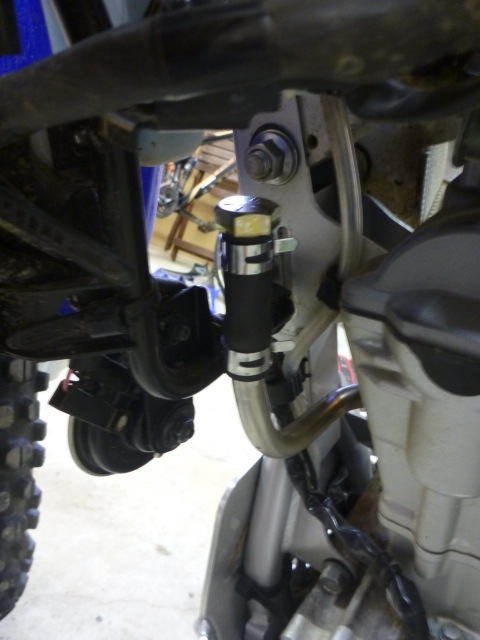 Oh yah! Whale tail and gorpie signals are gone too.... 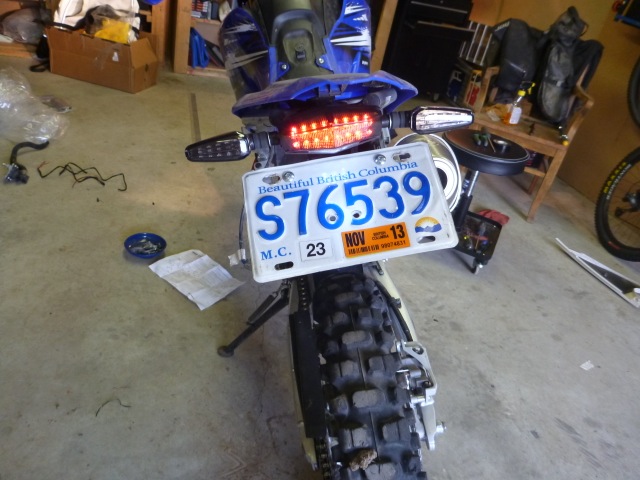 Front signals. I bought the connector kit but in the end soldered them anyway. I kinda don't like quick connects....tend to fail from water (and salt if you're in Ontario). 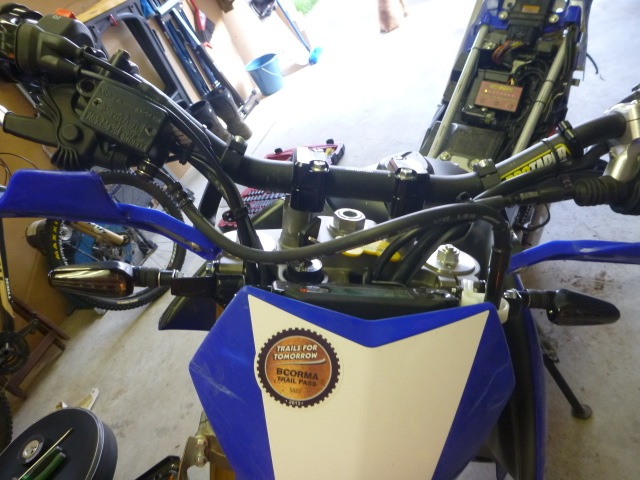 Where'd all this stuff come from?? 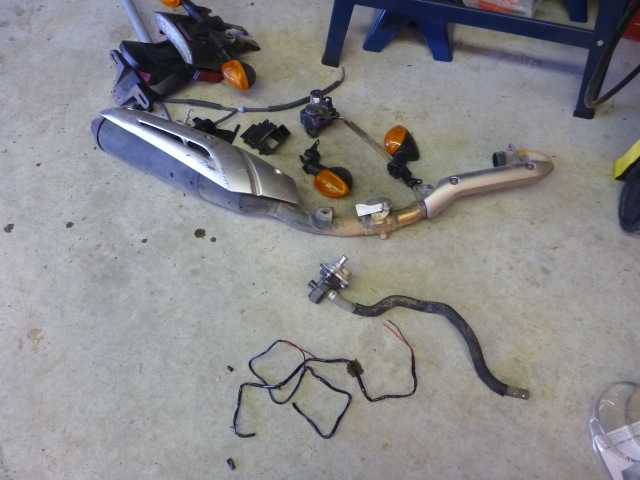 Picture of the trim job - next time I have the exhaust off I'll probably trim some more to make it look better, but this is functional. Lots of space.  Finished.   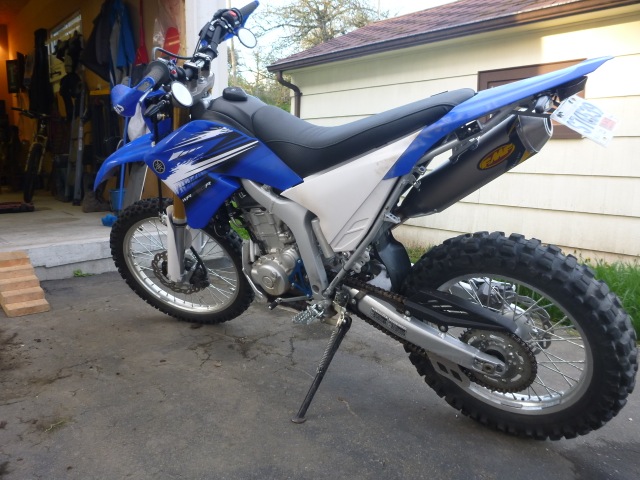 Added the GiantLoop heat reflectors (one comes with a bag when you order direct from them) 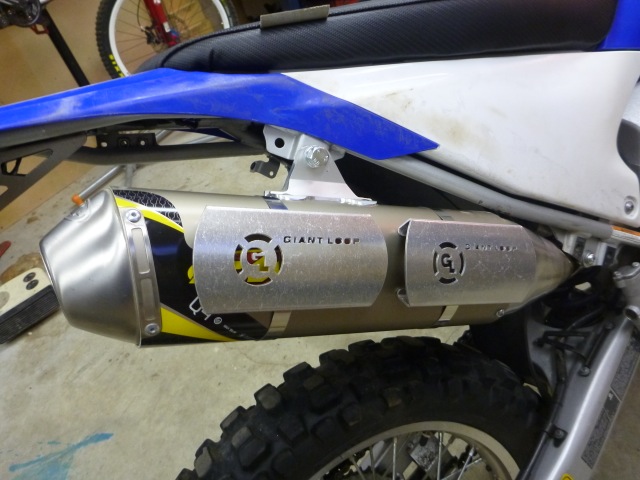 With the Mojavi bag on ready for tomorrow's trails. 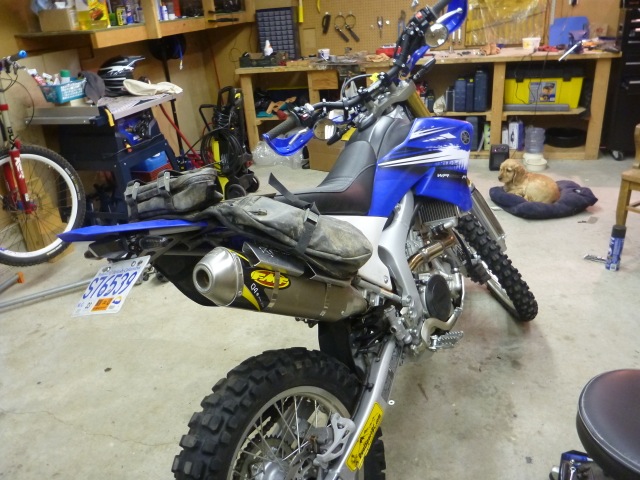 Dogs done.....so am I. This was two long evenings and a long day on saturday to get done. Enjoyable all the way though! I didn't take a pic but I installed the MotionPro micro fork bleeders as well - we'll see how they do. Lots of complaints that they leak, but I'm guessing they were overtightened. I don't see why these should leak. 
Last edited by LordEndo on Mon Apr 15, 2013 11:55 pm; edited 1 time in total | |
| | | | LordEndo
| | Subject: Re: Start of the next (1st?) major upgrade. Sun Apr 14, 2013 10:53 pm | |
| No pics from the trail test - so here it is. Was it worth the money???  No doubt yes. I can't believe the performance. I mean - yesterday when I test rode it around on the streets I could really tell that it revs out faster and the top end is vastly improved. But today in the trail it was very apparent that there is now a real bottom end (thought it was good before....but no) and full throttle really means something. Wheelies over waterbars and such were much nicer - much less work, wheel is up higher... No clutch required! I run a 12 tooth front sprocket, but that's not new. In the trail I was clutching far less. Imagine the difference between a 13t and a 12t in tight trail. These mods were that much difference again. It rode like a bigger bike. I was crawling through the mud, up the inclines and over all the techy bits like my co-riders do on their KTM 550's or whatever. I can climb and ride in second gear much more now where I had to be in first before. So much better from bottom to top and back again..... So....I'm a believer. It'd be interesting to see if the Megabomb makes a difference. I can tell you it's not required - Powerbomb gives more than enough bottom end. This is BC and we ride some steep gnarly stuff both up and down - so I believe it's a legitimate trail test. Really loving the way the overall setup is right now. I hope I'm still happy with it when the Safari tank goes on this week. I didn't mind the extra noise - and my riding buddies thought it sounded great. I even had a cop behind me on the way home. No problems. But it is loud, there is no doubt. Not Harley loud though. As an aside - the fork bleeders are awesome. Unreal how much air builds up in there! I found that I only really had to bleed them once. I did it a bunch of times but didn't get much after the first bleed. If I had hair it would have been blown back by the first pressure release! 2nd Aside. I've been using this S100 spray on cleaner stuff. It's supposed to break down the dirt and then just spray it off. It really works well! Not the cheapest way to clean your bike, but it really works. I even used it on some old (like 3 years old) grime in tough to get suspension spots on my DH mountain bike - cleaned it right off like it was never there. | |
| | | | Biglake
| | Subject: Re: Start of the next (1st?) major upgrade. Mon Apr 15, 2013 7:09 pm | |
| Looks good  I agree 100% on the pipe and programmer making the bike a bunch easier to ride off road, the extra low end is needed off road more than on road imo, you just dont need alot of low end on the road its easy to keep the revs up on the street. High fives programmer settings didnt work for me either, im slightly richer than the default settings tho. I think the programmers peramiters have change over the years but have no way of proving it, you no longer need to send them in for a reflash to run with big bores tho. | |
| | | | Rusty Shovel

| | Subject: Re: Start of the next (1st?) major upgrade. Mon Apr 15, 2013 11:34 pm | |
| Nice write up Endo.  | |
| | | | ACDSWRR

| | Subject: AIS Tube mod Tue Apr 16, 2013 1:51 pm | |
| Cut the AIS tube close to the plate, (about 3/4" away) pinch it together and weld the seam. Now you can use stock gasket and bolts. You can always find the tube on ebay or just buy it from OEM, its like $16.00, if for some reason you needed to install back to factory. | |
| | | | LordEndo
| | Subject: Re: Start of the next (1st?) major upgrade. Tue Apr 16, 2013 9:09 pm | |
| - ACDSWRR wrote:
- Cut the AIS tube close to the plate, (about 3/4" away) pinch it together and weld the seam. Now you can use stock gasket and bolts. You can always find the tube on ebay or just buy it from OEM, its like $16.00, if for some reason you needed to install back to factory.
I was figuring on doing that but you'd be surprised how hard it is to find someone around town who can weld aluminum...... Apparently those nice little Lincoln welders can do steel or aluminum - flux core wire. | |
| | | | LordEndo
| | Subject: Is this the WR250R upgrade support group? Wed Apr 17, 2013 12:58 am | |
| I think I may have a problem..... Received my 3.7g Safari tank today - the blue looks pretty close, will be installing tomorrow night. Picked up DRC footpegs (stock height), a hi-flo no toil airfilter, a Shorai battery, and am waiting on a steel 47t sprocket. Decided after much deliberation to not go the 14/49 sprocket setup. I get the idea, but in my opinion the 13t front will leave more room for clearing stuff out and I'm offroad in some nasty stuff most of the time. Correct tension and care is obviously going to be the key - I've read some posts where people are adjusting their chains for 30mm spacing to the bottom of the swing arm......um.....8-13mm is what the guideline says?  I can always throw the 12t back on for ultra low gearing then too (apparently I'll want this for McNutt - dubbed the north shore of dirt biking.....being as I'm a mountain biker and ride the north shore a lot I'm taking this quite seriously.....) Last thing to buy - sheepskin or butt pad of some sort for long rides. I have a seat concepts seat on there, and it helps a lot, but am still sore by the end of the day, just not nearly as bad. Thing is that out here in BC it apparently rains now and then (scoff), so perhaps the sheepskin isn't the way to go.....but I really like the looks of the Alaska Leather skins..... Other than suspension this will have the bike all setup the way I planned.....what's next? and what's wrong with me?  | |
| | | | LordEndo
| | Subject: Safari Tank Fri Apr 19, 2013 2:28 am | |
| So this turned out to be the toughest of all. I messed about with my Flatline rad guard.....trimming and bending, but in the end the welded part gets in the way. For now I doubled up a section of an old tube and tie wrapped it in there. Once I've licked my wounds I may pull it apart and do some fab on the guard. I had a lot of trouble getting the tank to stop leaking. The first time I deserved it as I didn't tighten the retaining ring for the fuel pump uniformly. Leaked like a sieve.....but it wasn't terribly apparent until after I got a couple gallons in there and ran it for a bit. So now it kind of turned into Mr. Bean installs a Safari tank on a WR..... I removed the tank full of gas (didn't spill much actually), flipped upside down (blocked the vent tube) and reinstalled the retaining ring very carefully. Spun each bolt until it nearly touched the ring, then snugged in an opposing torque pattern, then tightened the same way. Better this time, but still weeping a little. So now I'm turning the tank sideways on the bike and looking underneath, flipping it and flopping it about, etc. In the end I finally got my torque wrench out and tighten it up to 7 Nm. It's not leaking, but I still see it sweating a little around the top edge. Ah well.....doesn't drip or anything....so I'm gonna let it sit overnight and take it for a run tomorrow to see how it really is. *Update * - the problem was the gasket / o-ring. It is direction and I had it in backwards. Held up for a while that way, but eventually started leaking and I figured it out after pulling it apart * I bought and installed the foam block anti-sloshing stuff as well. Just sitting on the bike with the tank half full and leaning it back and forth it's apparent that the foam is going to make a nice difference. You gotta really throw it around to feel even the slightest sloshing which will be imperceptible in the trail I think. *Update - not a fan of how I can't tell the gas level. I want to ride with 1/2 tank most of the time to save the weight - recommend going with the opaque tank* Looks totally badass with that Safari tank.....   If you look closely you'll see the tube tucked in over the welds.   I also installed the Shorai battery - nice that they send a bunch of foam spacers - wow this battery is incredibly light and it's shocking the difference compared to the stocker. It seems the key with these Lithium Iron batteries don't like to be discharged under 13v - full charge is 14.8v. So I guess I'll keep it on the trickle charger through the week (I normally ride only weekends now until the weather gets a little nicer). The No Toil air filter went in as well. I dunno - looks about the same as the stocker to me. Good to have a couple filters though so I don't have to wait until one dries.
Last edited by LordEndo on Mon Feb 17, 2014 8:18 pm; edited 1 time in total | |
| | | | pbnut

| | Subject: Re: Start of the next (1st?) major upgrade. Fri Apr 19, 2013 1:13 pm | |
| Careful with the battery. One of the batteries I have cautions against using standard chargers. Also, these batteries don't self-discharge at the same rate as lead-acid batteries so charging likely isn't even needed if you ride most weekends.
The Anti-Gravity battery in my bike sat for almost 7 months and the bike started right up last week. | |
| | | | LordEndo
| | Subject: Re: Start of the next (1st?) major upgrade. Fri Apr 19, 2013 2:17 pm | |
| 7 months! That's pretty good. The only caution on this one is not to use a charger that has the anti-sulfation business on it. A 1.8a trickle charger like mine should be fine I think as the docs that came with the battery okay it so long as it keeps it below 14.8v. Thanks for the heads up though! | |
| | | | pbnut
| | Subject: Re: Start of the next (1st?) major upgrade. Fri Apr 19, 2013 2:57 pm | |
| That must be it. That rings a bell. It's been a while since I read that. | |
| | | | rsteiger

| | Subject: Re: Start of the next (1st?) major upgrade. Fri Apr 19, 2013 3:56 pm | |
| I put a Ballistic (LiFe) battery on my KTM 450 EXC. I had an issue since the terminals were reverse so I made some need cable out of heavier gage than the stock ones.
I have been told that the electric start on a KTM is more like a restart than an actual starter. On a cold engine the bike would often crank away on the old battery and never fire. Then I would kick start it and it generally fired right up and would be good from that point on.
Ever since replacing the battery and cables the bike fires right up on the electric start.
I seem to remember there were significantly more CCA with the LiFe battery than the one that was in there. | |
| | | | miniceptor86
| | Subject: Re: Start of the next (1st?) major upgrade. Fri Apr 19, 2013 4:48 pm | |
| I think your old battery on your KTM was not providing enough voltage when you were running the starter. My experience with electronic ignitions is that they don't like low voltage. | |
| | | | Biglake
| | Subject: Re: Start of the next (1st?) major upgrade. Fri Apr 19, 2013 6:14 pm | |
| - LordEndo wrote:
- ACDSWRR wrote:
- Cut the AIS tube close to the plate, (about 3/4" away) pinch it together and weld the seam. Now you can use stock gasket and bolts. You can always find the tube on ebay or just buy it from OEM, its like $16.00, if for some reason you needed to install back to factory.
I was figuring on doing that but you'd be surprised how hard it is to find someone around town who can weld aluminum......
Apparently those nice little Lincoln welders can do steel or aluminum - flux core wire. The ais tube is shiny plated steel, an alummium part on the exhaust would melt that close to head, it gets really hot. I welded mine up about an inch from the flange with a regular old pos flux core mig. The tank foam works wicked too, I had it in my 650 KLR it made a big difference in off road handling. Most people think im nuts tho, they havent ever heard of putting tank foam in a dirt bikes tank. IMO a dirt bike with a big tank needs it more than a race bike with a small tank. | |
| | | | LordEndo
| | Subject: Re: Start of the next (1st?) major upgrade. Fri Apr 19, 2013 11:08 pm | |
| - Biglake wrote:
- LordEndo wrote:
- ACDSWRR wrote:
- Cut the AIS tube close to the plate, (about 3/4" away) pinch it together and weld the seam. Now you can use stock gasket and bolts. You can always find the tube on ebay or just buy it from OEM, its like $16.00, if for some reason you needed to install back to factory.
I was figuring on doing that but you'd be surprised how hard it is to find someone around town who can weld aluminum......
Apparently those nice little Lincoln welders can do steel or aluminum - flux core wire.
The ais tube is shiny plated steel, an alummium part on the exhaust would melt that close to head, it gets really hot.
I welded mine up about an inch from the flange with a regular old pos flux core mig.
The tank foam works wicked too, I had it in my 650 KLR it made a big difference in off road handling.
Most people think im nuts tho, they havent ever heard of putting tank foam in a dirt bikes tank.
IMO a dirt bike with a big tank needs it more than a race bike with a small tank. Really? I would have guessed the tube is aluminum!! You would know from welding it though. I'm hoping to pickup a Lincoln welder when I find the right deal, so that'll be one of the first jobs.  I just went for a test ride and I couldn't agree more about the foam. What a difference! No leakage either - I'm just being too anal about the bit of sweating I could see I guess. I'll pull it all off again tomorrow post ride as I want to check how my plug looks as well. Davis Lake 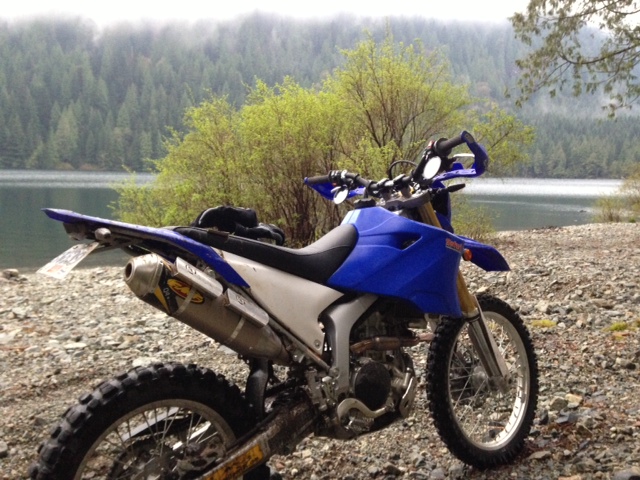 I make this shit look good......   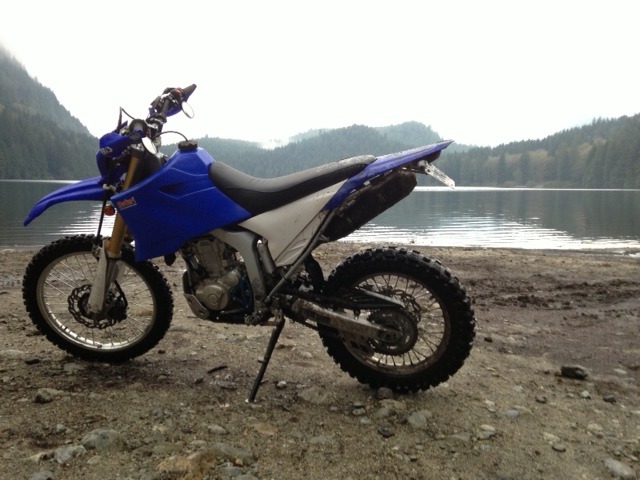 Norish Creek  When I was in the trails around Davis Lake I got stuck on a climb, slid backwards for a while and finally dumped in a rock bed. Good test for the right side of the tank...bad test for me knee.... :0) (didn't wear all my gear 'cause I wasn't going to get into anything serious.....scoff....). Later on a nice off camber steep I dropped to the left side. So all in all a good test ride and the tank seems to hold up well in the rough stuff. | |
| | | | LordEndo
| | Subject: Re: Start of the next (1st?) major upgrade. Mon Apr 29, 2013 6:38 pm | |
| Wipeout this weekend strained my MCL so I'm out for a few days I guess (hopefully not weeks!).
Up until my poorly executed dismount we were riding some of the most technical trails I've done so far. Three of us, all offroad riders over the last twenty years - a KTM450, KLX250 and my WR250R. The extra size of the tank didn't bother me at all and I even rolled in with probably 3/4 of a tank or more. No issue in the tight stuff, lifting the front end, climbs, etc. I can't really comment on the weight of pulling the bike back up the ravine and through the slash as it was my compadres that took care of that as I licked my wounds..... :0)
Thanks guys.....always ride with friends and it doesn't hurt to buy them breakfast first!!
| |
| | | | mel22b
| | Subject: Re: Start of the next (1st?) major upgrade. Wed May 01, 2013 12:25 pm | |
| Great build up! I have so far to go. | |
| | | | LordEndo
| | Subject: Re: Start of the next (1st?) major upgrade. Wed May 01, 2013 12:54 pm | |
| - mel22b wrote:
- Great build up! I have so far to go.
I think most do it a bit at a time. I investigated so much and read so many reviews and threads and hunted prices, etc that in the end I figured if I'm pulling it apart I'd do it all 'cause I wanted all those improvements. In my opinion it worked out great because the weight of the bike should be roughly the same as stock now after all the additions. Will have to fill up the tank and take a ride to the dump where they can weight the bike on the scale Very worthwhile mods! All of them!! Loved the ride last weekend in the gnarliest stuff I'd ridden yet! | |
| | | | LordEndo
| | Subject: A few weeks in on the battery upgrade Fri May 17, 2013 3:45 pm | |
| I've been injured for a few weeks now (3 weeks now I think it's been) so the WR has been sitting idle. I plugged in the trickle charger last night and the battery only took maybe 20 seconds of charge, so I can confirm that the Lithium Iron discharge rate is in fact much less...... | |
| | | | zestymac

| | Subject: Re: Start of the next (1st?) major upgrade. Fri May 17, 2013 5:06 pm | |
| Have the shock and forks revalved. It will be THE best $$$ you spend, and you'll notice it everywhere. | |
| | | | Biglake
| | Subject: Re: Start of the next (1st?) major upgrade. Sat May 18, 2013 9:03 am | |
| +1
Getting the shock done is way more improtant than than the forks tho, if you dont want to spend too much on suspension mods. | |
| | | | Sponsored content
| | Subject: Re: Start of the next (1st?) major upgrade. | |
| |
| | | | | | Start of the next (1st?) major upgrade. | |
|
Similar topics | |
|
| | Permissions in this forum: | You cannot reply to topics in this forum
| |
| |
| |