| | New Tires - The process - Heavy w/Pictures |  |
|
+9Rusty Shovel dmmcd mvonhatten bigg Peterbuilt gatorfan chuckP Biglake motokid 13 posters |
|
| Author | Message |
|---|
motokid
Moderator

 |  Subject: New Tires - The process - Heavy w/Pictures Subject: New Tires - The process - Heavy w/Pictures  Sat Apr 13, 2013 10:25 am Sat Apr 13, 2013 10:25 am | |
| So I'm getting new tires. BT-003rs Bridgestones to replace my Distanzias. Also want new front brake pads as I've got a little over 10,658 miles on them. They're stock pads. Here's some pic's on the process. Set yourself up for success. I loosen the most difficult bolts before putting bike up on stand. Less chance of bike falling over from getting a little physical.  Not many tools required for removing wheels - standard stuff- nothing special: 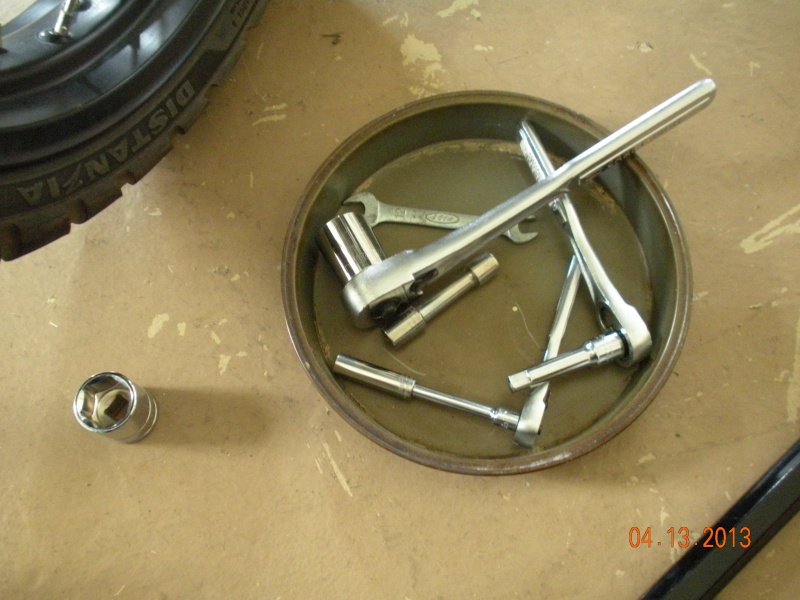 Be aware that both wheels have spacers of different sizes. Keep track of where the bigger one goes. Can be a real headache if you mix them up. Don't ask me how I know... here's the spacers from rear wheel:  (more coming)
_________________
2008 WR250X
Gearing: 13t - 48t
Power Commander 5 / PC-V
Airbox Door Removed - Flapper glued - AIS removed
FmF Q4
Bridgestone Battlax BT-003rs
| |
|
  | |
motokid
Moderator

 |  Subject: Re: New Tires - The process - Heavy w/Pictures Subject: Re: New Tires - The process - Heavy w/Pictures  Sat Apr 13, 2013 10:28 am Sat Apr 13, 2013 10:28 am | |
| Big spacer on rear goes on sprocket side:  Small spacer from rear wheel goes on brake side:  And pay attention to how the nut, washer and axle block come off:  Yes - I will clean things up before reassembly....
_________________
2008 WR250X
Gearing: 13t - 48t
Power Commander 5 / PC-V
Airbox Door Removed - Flapper glued - AIS removed
FmF Q4
Bridgestone Battlax BT-003rs
| |
|
  | |
motokid
Moderator

 |  Subject: Re: New Tires - The process - Heavy w/Pictures Subject: Re: New Tires - The process - Heavy w/Pictures  Sat Apr 13, 2013 10:33 am Sat Apr 13, 2013 10:33 am | |
| To make reassembly less of a headache I always spread the brake pads out very gently. Before: 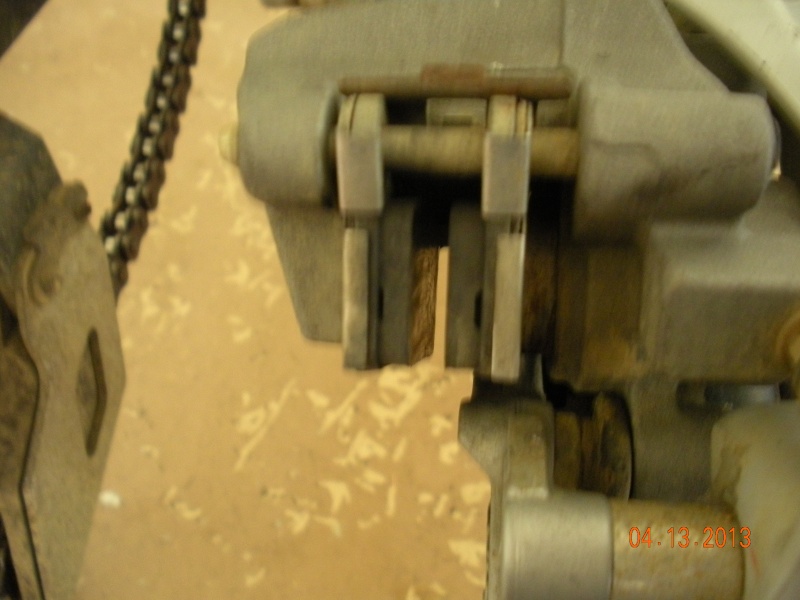 after: 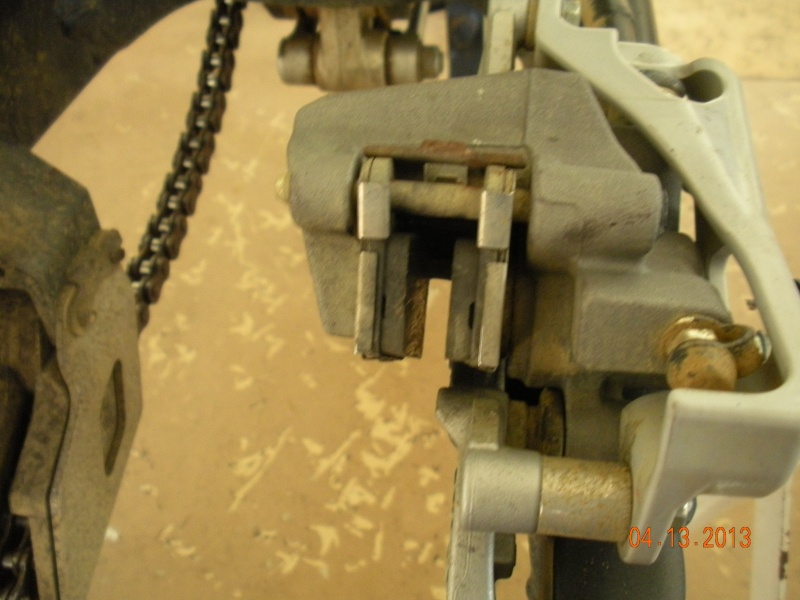 And back the chain adjustment bolts in fairly far: 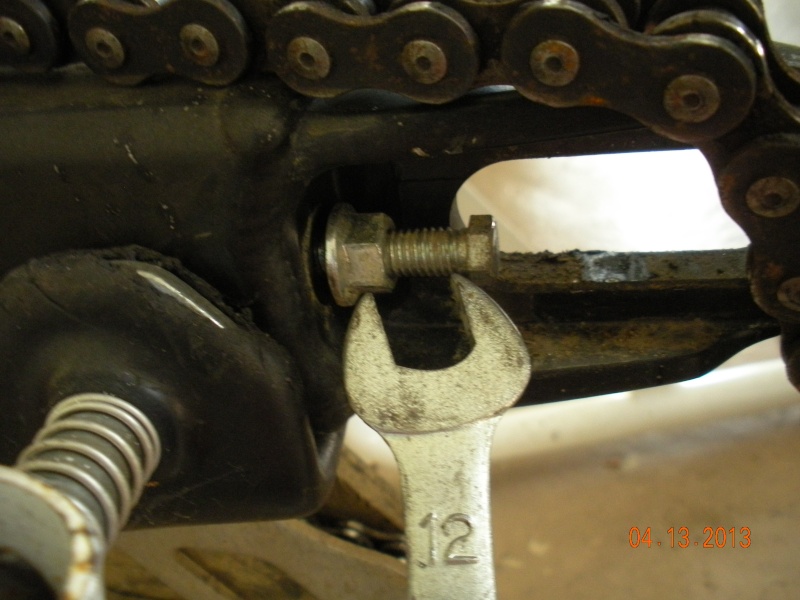
_________________
2008 WR250X
Gearing: 13t - 48t
Power Commander 5 / PC-V
Airbox Door Removed - Flapper glued - AIS removed
FmF Q4
Bridgestone Battlax BT-003rs
| |
|
  | |
motokid
Moderator

 |  Subject: Re: New Tires - The process - Heavy w/Pictures Subject: Re: New Tires - The process - Heavy w/Pictures  Sat Apr 13, 2013 10:36 am Sat Apr 13, 2013 10:36 am | |
| On the front, be sure to loosen the 4 pinch bolts on forks before you try to remove axle: Here's two - the ones on top: 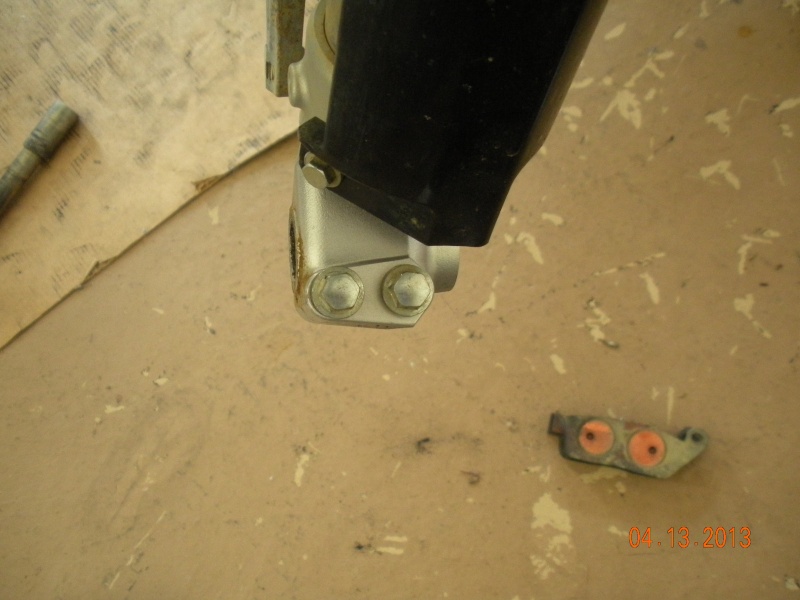 There are different spacers on front wheel too. Here's non-brake side:  And here's brake side - there's a lip on one end, pay attention to that: 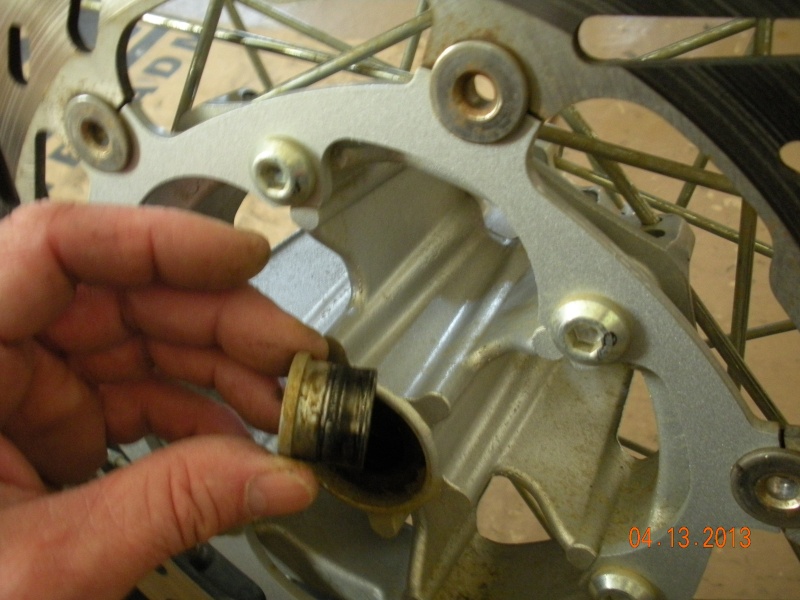
_________________
2008 WR250X
Gearing: 13t - 48t
Power Commander 5 / PC-V
Airbox Door Removed - Flapper glued - AIS removed
FmF Q4
Bridgestone Battlax BT-003rs
| |
|
  | |
motokid
Moderator

 |  Subject: Re: New Tires - The process - Heavy w/Pictures Subject: Re: New Tires - The process - Heavy w/Pictures  Sat Apr 13, 2013 10:38 am Sat Apr 13, 2013 10:38 am | |
| I had an audience for all this: 
_________________
2008 WR250X
Gearing: 13t - 48t
Power Commander 5 / PC-V
Airbox Door Removed - Flapper glued - AIS removed
FmF Q4
Bridgestone Battlax BT-003rs
| |
|
  | |
motokid
Moderator

 |  Subject: Re: New Tires - The process - Heavy w/Pictures Subject: Re: New Tires - The process - Heavy w/Pictures  Sat Apr 13, 2013 10:42 am Sat Apr 13, 2013 10:42 am | |
| For removing front brake pads there's only one screw and one bolt you need to remove: Here's the cover (protecting screw) that you can remove with a standard screw driver: (sort of bottom left in picture)  Here's the hex head bolt:  If you're just going to check your pads be careful removing bolt. They will fall out the second the bolt looses contact with pad Here's the pads:  
_________________
2008 WR250X
Gearing: 13t - 48t
Power Commander 5 / PC-V
Airbox Door Removed - Flapper glued - AIS removed
FmF Q4
Bridgestone Battlax BT-003rs
Last edited by motokid on Sat Apr 13, 2013 10:57 am; edited 1 time in total | |
|
  | |
motokid
Moderator

 |  Subject: Re: New Tires - The process - Heavy w/Pictures Subject: Re: New Tires - The process - Heavy w/Pictures  Sat Apr 13, 2013 10:45 am Sat Apr 13, 2013 10:45 am | |
| I weighed the wheels and used Distanzias. Front wheel and tire minus spacers: 23 pounds Rear wheel and tire minus spacers: 28 pounds. Follow up weights with new BT-003's will come when I get them mounted. Pics of new pads against old pads when I get them. Hopefully - bike won't look like this for too long: 
_________________
2008 WR250X
Gearing: 13t - 48t
Power Commander 5 / PC-V
Airbox Door Removed - Flapper glued - AIS removed
FmF Q4
Bridgestone Battlax BT-003rs
| |
|
  | |
motokid
Moderator

 |  Subject: Re: New Tires - The process - Heavy w/Pictures Subject: Re: New Tires - The process - Heavy w/Pictures  Sat Apr 13, 2013 10:51 am Sat Apr 13, 2013 10:51 am | |
| Why new tires? State inspection coming up in May.  Dry rot cracks? 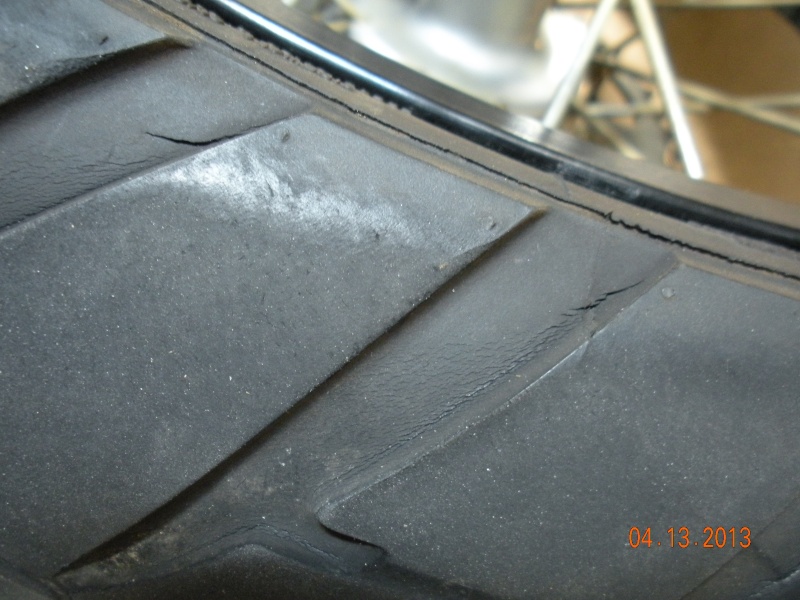 I don't know. I had great plans to do more off road stuff. Never happened. Ready to go back to pure street tires for the better ashault traction.
_________________
2008 WR250X
Gearing: 13t - 48t
Power Commander 5 / PC-V
Airbox Door Removed - Flapper glued - AIS removed
FmF Q4
Bridgestone Battlax BT-003rs
| |
|
  | |
Biglake
 |  Subject: Re: New Tires - The process - Heavy w/Pictures Subject: Re: New Tires - The process - Heavy w/Pictures  Sat Apr 13, 2013 11:03 am Sat Apr 13, 2013 11:03 am | |
| - motokid wrote:
- To make reassembly less of a headache I always spread the brake pads out very gently.
Before:

after:

And back the chain adjustment bolts in fairly far:
 Theres no reason to back the chain adjuster bolts off... Once you pull the axle out you can push the wheel ahead to get the chain off and on. Just trying to save you some work  | |
|
  | |
motokid
Moderator

 |  Subject: Re: New Tires - The process - Heavy w/Pictures Subject: Re: New Tires - The process - Heavy w/Pictures  Sat Apr 13, 2013 11:13 am Sat Apr 13, 2013 11:13 am | |
| I was suggesting it for less headaches during reassembly. For pushing the axle back through, aligning the brake disk into the calipers, and getting the chain back on....making all systems as "loose" as possible makes less struggles for me. Plus - it's not really any work. It forces me to pay closer attention to chain adjustment after new wheels are put on. It's just my procedure. Works for me.  
_________________
2008 WR250X
Gearing: 13t - 48t
Power Commander 5 / PC-V
Airbox Door Removed - Flapper glued - AIS removed
FmF Q4
Bridgestone Battlax BT-003rs
| |
|
  | |
Biglake
 |  Subject: Re: New Tires - The process - Heavy w/Pictures Subject: Re: New Tires - The process - Heavy w/Pictures  Sat Apr 13, 2013 11:41 am Sat Apr 13, 2013 11:41 am | |
| Different strokes for diferent folks I guess.
I've tried it both ways backing off the chain adjusters doesnt make any difference at all on reassembly for me. | |
|
  | |
motokid
Moderator

 |  Subject: Re: New Tires - The process - Heavy w/Pictures Subject: Re: New Tires - The process - Heavy w/Pictures  Sat Apr 13, 2013 2:26 pm Sat Apr 13, 2013 2:26 pm | |
| If you're buying brake pads from local dealer, be sure to take your old ones with you. I had mine, and the it appears the X pads are about 3/8's to a half inch longer than R pads, but they look identical without a reference. I was sold the wrong pads, but I had the stock ones with me. When I checked in parking lot is was clear I had the wrong ones. Any way....  Compared to stock pads:  Breaking in new tires and new front brakes at same time....  Talk about taking it easy to start....not leaving driveway until I know brakes can stop me.  I won't have tires and wheels until tomorrow.
_________________
2008 WR250X
Gearing: 13t - 48t
Power Commander 5 / PC-V
Airbox Door Removed - Flapper glued - AIS removed
FmF Q4
Bridgestone Battlax BT-003rs
| |
|
  | |
Biglake
 |  Subject: Re: New Tires - The process - Heavy w/Pictures Subject: Re: New Tires - The process - Heavy w/Pictures  Sat Apr 13, 2013 3:59 pm Sat Apr 13, 2013 3:59 pm | |
| Can I have your old brake pads? They're only 1/2 worn out lol. | |
|
  | |
motokid
Moderator

 |  Subject: Re: New Tires - The process - Heavy w/Pictures Subject: Re: New Tires - The process - Heavy w/Pictures  Sat Apr 13, 2013 4:01 pm Sat Apr 13, 2013 4:01 pm | |
| - Biglake wrote:
- Can I have your old brake pads? They're only 1/2 worn out lol.
Yeah - that's kind of amazing after 10,500+ miles. I'll be holding on to them in case the new pads give me issues.
_________________
2008 WR250X
Gearing: 13t - 48t
Power Commander 5 / PC-V
Airbox Door Removed - Flapper glued - AIS removed
FmF Q4
Bridgestone Battlax BT-003rs
| |
|
  | |
chuckP
 |  Subject: Re: New Tires - The process - Heavy w/Pictures Subject: Re: New Tires - The process - Heavy w/Pictures  Sat Apr 13, 2013 6:03 pm Sat Apr 13, 2013 6:03 pm | |
| Nice write up Motokid. Let us know how you like those pads. | |
|
  | |
motokid
Moderator

 |  Subject: Re: New Tires - The process - Heavy w/Pictures Subject: Re: New Tires - The process - Heavy w/Pictures  Sat Apr 13, 2013 6:11 pm Sat Apr 13, 2013 6:11 pm | |
| - chuckP wrote:
- Nice write up Motokid. Let us know how you like those pads.
Thanks, and you bet. 
_________________
2008 WR250X
Gearing: 13t - 48t
Power Commander 5 / PC-V
Airbox Door Removed - Flapper glued - AIS removed
FmF Q4
Bridgestone Battlax BT-003rs
| |
|
  | |
gatorfan

 |  Subject: Re: New Tires - The process - Heavy w/Pictures Subject: Re: New Tires - The process - Heavy w/Pictures  Sat Apr 13, 2013 8:25 pm Sat Apr 13, 2013 8:25 pm | |
| Moto, good write-up. Especially helpful was the different spacers up front. I need to check mine.
If it's not too much trouble could you post a pic of how your flashers sit in your Edge 2 bracket. (Post it under tail lights so as not to bump thread). Thanks. | |
|
  | |
Peterbuilt

 |  Subject: Re: New Tires - The process - Heavy w/Pictures Subject: Re: New Tires - The process - Heavy w/Pictures  Sun Apr 14, 2013 11:45 am Sun Apr 14, 2013 11:45 am | |
| Looks good so far Motokid..
You'll love the 003r's.. They are wiked sticky! What kind of front pads did you get? Double sintered?
| |
|
  | |
motokid
Moderator

 |  Subject: Re: New Tires - The process - Heavy w/Pictures Subject: Re: New Tires - The process - Heavy w/Pictures  Sun Apr 14, 2013 2:25 pm Sun Apr 14, 2013 2:25 pm | |
| Gaterfan: Stock signals... small "L" bracket:  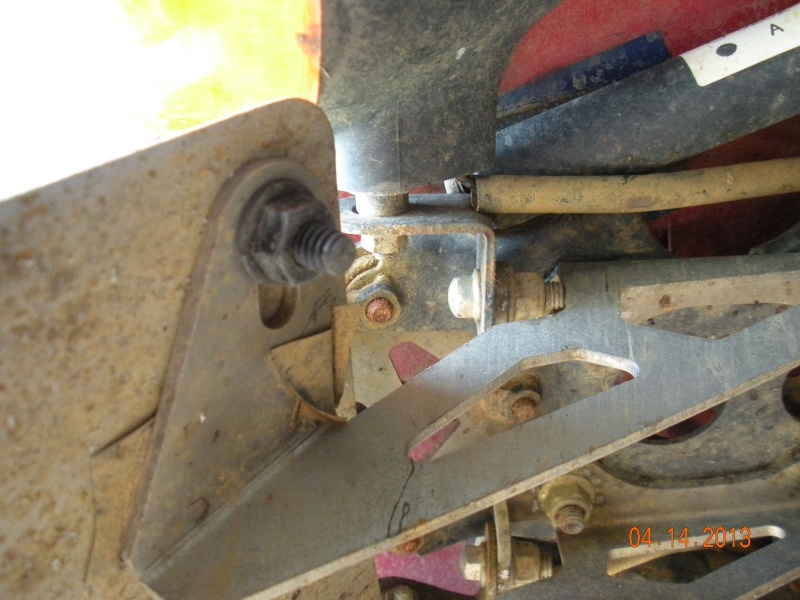
_________________
2008 WR250X
Gearing: 13t - 48t
Power Commander 5 / PC-V
Airbox Door Removed - Flapper glued - AIS removed
FmF Q4
Bridgestone Battlax BT-003rs
| |
|
  | |
motokid
Moderator

 |  Subject: Re: New Tires - The process - Heavy w/Pictures Subject: Re: New Tires - The process - Heavy w/Pictures  Sun Apr 14, 2013 2:26 pm Sun Apr 14, 2013 2:26 pm | |
| Got my packing....but that'll wait for next weekend. 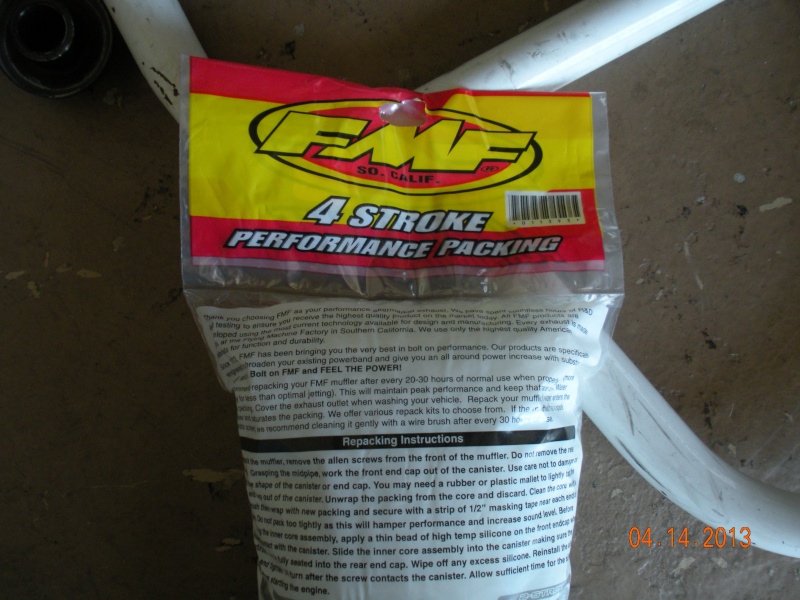
_________________
2008 WR250X
Gearing: 13t - 48t
Power Commander 5 / PC-V
Airbox Door Removed - Flapper glued - AIS removed
FmF Q4
Bridgestone Battlax BT-003rs
| |
|
  | |
motokid
Moderator

 |  Subject: Re: New Tires - The process - Heavy w/Pictures Subject: Re: New Tires - The process - Heavy w/Pictures  Sun Apr 14, 2013 2:29 pm Sun Apr 14, 2013 2:29 pm | |
| God damn getting the front back on with the forks twisting independently, and the spacers and the brake disk.....    The tires:  The weights. Front without spacers: 21.5 pounds Rear without spacers: 28 pounds Beware when other people mount your tires. Check the air pressure. Both were inflated to 38 pounds.
_________________
2008 WR250X
Gearing: 13t - 48t
Power Commander 5 / PC-V
Airbox Door Removed - Flapper glued - AIS removed
FmF Q4
Bridgestone Battlax BT-003rs
| |
|
  | |
motokid
Moderator

 |  Subject: Re: New Tires - The process - Heavy w/Pictures Subject: Re: New Tires - The process - Heavy w/Pictures  Sun Apr 14, 2013 2:51 pm Sun Apr 14, 2013 2:51 pm | |
| - Peterbuilt wrote:
- ! What kind of front pads did you get? Double sintered?
Sintered. Not sure about double?  Double H sintered superbike pads is what the website says. Part Number: FA142HH
_________________
2008 WR250X
Gearing: 13t - 48t
Power Commander 5 / PC-V
Airbox Door Removed - Flapper glued - AIS removed
FmF Q4
Bridgestone Battlax BT-003rs
| |
|
  | |
bigg

 |  Subject: Re: New Tires - The process - Heavy w/Pictures Subject: Re: New Tires - The process - Heavy w/Pictures  Sun Apr 14, 2013 3:50 pm Sun Apr 14, 2013 3:50 pm | |
| - motokid wrote:
- Peterbuilt wrote:
- ! What kind of front pads did you get? Double sintered?
Sintered. Not sure about double? 
Double H sintered superbike pads is what the website says.
Part Number: FA142HH what's the advantage compared to the stock pads? I'm quite happy with the stocks, especially their longevity. like yours mine still have a lot of life in them after nearly 12000 miles. sintered / double sintered provide more bite? | |
|
  | |
motokid
Moderator

 |  Subject: Re: New Tires - The process - Heavy w/Pictures Subject: Re: New Tires - The process - Heavy w/Pictures  Sun Apr 14, 2013 4:31 pm Sun Apr 14, 2013 4:31 pm | |
| I have no clue if there's any advantage. Those were in stock. Meaning, I got what they had. I asked for brake pads for wr250x. I did not request a specific kind, brand or variety. Dude came back with, this is all we have for your bike. So I bought 'em. 
_________________
2008 WR250X
Gearing: 13t - 48t
Power Commander 5 / PC-V
Airbox Door Removed - Flapper glued - AIS removed
FmF Q4
Bridgestone Battlax BT-003rs
| |
|
  | |
mvonhatten

 |  Subject: Re: New Tires - The process - Heavy w/Pictures Subject: Re: New Tires - The process - Heavy w/Pictures  Sun Apr 14, 2013 9:08 pm Sun Apr 14, 2013 9:08 pm | |
| Nice write up! Love how clean your bike looks with white plastics and 0 stickers. | |
|
  | |
Sponsored content
 |  Subject: Re: New Tires - The process - Heavy w/Pictures Subject: Re: New Tires - The process - Heavy w/Pictures  | |
| |
|
  | |
| | New Tires - The process - Heavy w/Pictures |  |
|
