| | My WR250R Build. |  |
|
+20WRXer LordEndo mudmojo Coop mordicai mcdoudlehopper IndigoWolf No~One motokid nu_b SheWolf YZEtc Jäger MotoKirby combo TBird1 0007onWR WRXR cryptomundo 47une 24 posters |
|
| Author | Message |
|---|
47une

 |  Subject: My WR250R Build. Subject: My WR250R Build.  Fri Apr 15, 2011 8:04 pm Fri Apr 15, 2011 8:04 pm | |
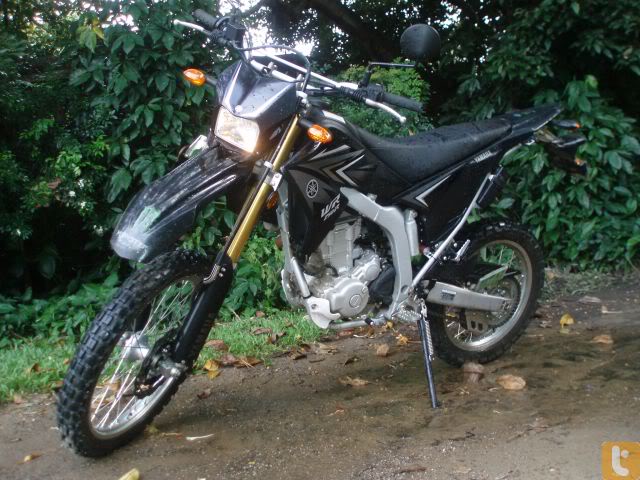
| Hi all, Here is where I am going to document all the modifications etc that will be done to my newly purchased WR250R. It may be interesteing to some, it may not be to others, you decide whether you stay and read on. So first off, I bought a bone stock 2010 black WR250R. It only had 3700km on it and was only 6 months old, so still still has a year and a half of its warrant!  | |
|
  | |
47une

 |  Subject: Re: My WR250R Build. Subject: Re: My WR250R Build.  Fri Apr 15, 2011 8:25 pm Fri Apr 15, 2011 8:25 pm | |
| | |
|
  | |
47une

 |  Subject: Re: My WR250R Build. Subject: Re: My WR250R Build.  Fri Apr 15, 2011 8:44 pm Fri Apr 15, 2011 8:44 pm | |
|
Last edited by 47une on Fri Apr 15, 2011 9:23 pm; edited 1 time in total | |
|
  | |
47une

 |  Subject: Re: My WR250R Build. Subject: Re: My WR250R Build.  Fri Apr 15, 2011 8:48 pm Fri Apr 15, 2011 8:48 pm | |
| Next was removing the seat strap because it was annoying. Removed the bolts, strap came off, glued the foam back down:  | |
|
  | |
47une

 |  Subject: Re: My WR250R Build. Subject: Re: My WR250R Build.  Fri Apr 15, 2011 9:22 pm Fri Apr 15, 2011 9:22 pm | |
| I then started knocking up some pannier racks to suit my old RJays bags. This will only be a temporary thing until I get my giant loop. Back frame:  Measuring and mounting of back frame on the right side. Using the pillion pegs for the front mounting point:  Using the hole above the exhaust mount for the top mounting point:   For the rear mounting point I used the stock number plate section:   Right side complete:  Left side front mounting:  Left side top mounting using the helmet lock section:  Both of the rear mounts in and done:  Left side now complete also:  From the rear:  Bags just thrown over:  Clean and undercoat:  Completed ready for fitting:  On the bike:    | |
|
  | |
47une

 |  Subject: Re: My WR250R Build. Subject: Re: My WR250R Build.  Fri Apr 15, 2011 9:26 pm Fri Apr 15, 2011 9:26 pm | |
| | |
|
  | |
47une

 |  Subject: Re: My WR250R Build. Subject: Re: My WR250R Build.  Fri Apr 15, 2011 9:28 pm Fri Apr 15, 2011 9:28 pm | |
| Sanded out the scratches etc from the exhaust cover and painted it flat black. Not sure if I like it or not yet, might go silver: Before:   After:   | |
|
  | |
47une

 |  Subject: Re: My WR250R Build. Subject: Re: My WR250R Build.  Fri Apr 15, 2011 9:31 pm Fri Apr 15, 2011 9:31 pm | |
| Went on a decent ride with the bike fully loaded, full ride report coming soon:  | |
|
  | |
cryptomundo
 |  Subject: Re: My WR250R Build. Subject: Re: My WR250R Build.  Fri Apr 15, 2011 10:24 pm Fri Apr 15, 2011 10:24 pm | |
|
nice work on your bike .. that last picture, it looks like everything is solid, nicely distributed .. just curious, will your back tire clear that cross bar support on your rack?
| |
|
  | |
cryptomundo
 |  Subject: Re: My WR250R Build. Subject: Re: My WR250R Build.  Fri Apr 15, 2011 10:26 pm Fri Apr 15, 2011 10:26 pm | |
|
never mind the question about the crossbar, I just looked closer in one of the pictures and see how you did it .. for some reason I thought it was straight across
| |
|
  | |
WRXR

 |  Subject: Re: My WR250R Build. Subject: Re: My WR250R Build.  Fri Apr 15, 2011 11:56 pm Fri Apr 15, 2011 11:56 pm | |
| What kind of license place bracket is that?  | |
|
  | |
0007onWR

 |  Subject: Re: My WR250R Build. Subject: Re: My WR250R Build.  Sat Apr 16, 2011 2:46 am Sat Apr 16, 2011 2:46 am | |
| Nice job
Do you have to run the polution crap over there?
There's a bunch of room to be had under the seat with all the gear pulled out | |
|
  | |
47une

 |  Subject: Re: My WR250R Build. Subject: Re: My WR250R Build.  Sat Apr 16, 2011 5:55 am Sat Apr 16, 2011 5:55 am | |
| Crypto: Like you saw mate, yeah, they don't go straight across. They tyre will never hit.
WRXR: That is the standard issue Australian one.
0007onWR: Keeping the bike pretty well stock while it is still under warranty mate. | |
|
  | |
TBird1

 |  Subject: Re: My WR250R Build. Subject: Re: My WR250R Build.  Sat Apr 16, 2011 6:52 pm Sat Apr 16, 2011 6:52 pm | |
| BTW, the muffler shield looks great in black. | |
|
  | |
combo

 |  Subject: Re: My WR250R Build. Subject: Re: My WR250R Build.  Sun Apr 17, 2011 5:46 am Sun Apr 17, 2011 5:46 am | |
| impressive job on the racks, i like the giant loop also but i wouldn't pay 400 after that effort, looks great too | |
|
  | |
47une

 |  Subject: Re: My WR250R Build. Subject: Re: My WR250R Build.  Mon Apr 18, 2011 6:21 am Mon Apr 18, 2011 6:21 am | |
| | |
|
  | |
47une

 | |
  | |
47une

 | |
  | |
47une

 |  Subject: Re: My WR250R Build. Subject: Re: My WR250R Build.  Thu Apr 21, 2011 4:27 am Thu Apr 21, 2011 4:27 am | |
| Bought some bar end mirrors. Took them apart so they could mount to the bars:  Fitted up with old mirrors on to see the difference:  Both on and cleaned the front of the bike right up:   | |
|
  | |
MotoKirby
 |  Subject: Re: My WR250R Build. Subject: Re: My WR250R Build.  Thu Apr 21, 2011 11:10 am Thu Apr 21, 2011 11:10 am | |
| Very nice,I like that your plate covers that exposed radiator hose. The mirrors look good too, I have got to do something with the stockers on mine. Where did you get those bar end mirrors?
| |
|
  | |
47une

 |  Subject: Re: My WR250R Build. Subject: Re: My WR250R Build.  Fri Apr 22, 2011 4:48 am Fri Apr 22, 2011 4:48 am | |
| Yeah, I purposefully made the bash plate go up that high to cover the radiator hose. The mirrors were just from e-bay something like these: http://cgi.ebay.com.au/Pair-Motorcycle-Bar-End-Mirror-Honda-Yamaha-KTM-BMW-/180652769803?pt=AU_Motorcycle_Parts_Accessories&hash=item2a0fbe820b - MotoKirby wrote:
- Very nice,I like that your plate covers that exposed radiator hose. The mirrors look good too, I have got to do something with the stockers on mine. Where did you get those bar end mirrors?
| |
|
  | |
Jäger
Admin

 |  Subject: Re: My WR250R Build. Subject: Re: My WR250R Build.  Fri Apr 22, 2011 2:43 pm Fri Apr 22, 2011 2:43 pm | |
| That's the bash plate that everybody else should have built. HighFive was a casualty of insufficient bash plate coverage, somebody else reported a smashed pump cover the other day, and there's probably a few others out there as well by now.
Clean the lines and design up a little bit to spiff up the visual appearance, add the holes you mention, and you could easily end up being Sandman Parts v2.0, selling your good ideas to other members of the zoo... I'm probably low risk for damage caused by insufficient bash plate protection - but I think about it a lot when I'm up in the Rockies 70 miles from nowhere and zero vehicle traffic on the roads. I'd buy one...
BTW, for you and others with the underbar mirrors, can you actually get good visibility of traffic behind you with those things, or do they mostly just keep you legal. The stock mirrors are no screaming hell for visibility directly behind as it is without doing a little elbow tuck, so if underbar mirrors were the same or better, that would work for me. | |
|
  | |
47une

 | |
  | |
47une

 | |
  | |
YZEtc

 |  Subject: Re: My WR250R Build. Subject: Re: My WR250R Build.  Mon Apr 25, 2011 6:54 am Mon Apr 25, 2011 6:54 am | |
| Did you notice the oil change kit from Yamaha, originally intended for the 4-stroke YZs from 2003-onwards, doesn't have a drain plug washer in the 12mm size needed for the WR-250R/X?
Same story here in the USA.
It is a handy kit, though. :) | |
|
  | |
Sponsored content
 |  Subject: Re: My WR250R Build. Subject: Re: My WR250R Build.  | |
| |
|
  | |
| | My WR250R Build. |  |
|
