| | | DIY IMS 3.1 Gas tank installing |  |
| | |
| Author | Message |
|---|
BoredAzHell20
| | Subject: DIY IMS 3.1 Gas tank installing Sat Jul 16, 2011 4:41 pm | |
| Hello, So I changed this thread to a DIY on how to install a 3 gallon IMS tank. I guess it would be more helpful then the original post of, "where does this hose goes to." post (STEP 7 ON DIY)  . First ride the bike till the fuel light comes on. Less gas in the tank the better. 1. You will need to remove the seat by removing the two allen bolts under the tail of the seat. picture 1 2. Go to the side front fairings and removed the two allen screws in the front picture 2 3. You will need to unscrew the phillips head screw circled in yellow (underseat) and pull the fairing out (towards you) circled in red. After you have these off pull the fairing towards the front wheel and it should slide off easily. picture 3 NOW REPEAT STEPS 2 & 3 FOR THE OTHER SIDE FAIRINGS 4. Unscrew the tank mount allen bolts. One on top near handle bars and two at the base of the tank. top and bottom I know the pictures i have is a tank off the bike already, but you get the idea. 5. Remove the electric plug on the bottom of the fuel pump. Circled in yellow is the lever you will need to push to release the plug. picture 5 6. Next remove the fuel line to the fuel filter. First I pulled the fuel line out as far as it can go on the nipple then i started to work on the safety clip (orange clip). This will give you room to slide the safety clip off. Remove the orange safety (circled in yellow) clip by releasing the side clips and moving it back. Once that is out of the way, pinch the fuel line at the blue release tabs (circled in red) and pull away from the nipple of the fuel pump. The picture I have is the safety clip already unmounted and about to pull off the fuel line. PIcture 6 7. If you have a california model bike you will have an additional hose connected to the side of the tank stock tank. Remove this hose. You do not have to re-attach it when you install the new ims tank, but to meet california emissions you can hook up ims gas cap hose to this line. This picture shows the hose that has no home unless you re-attached it to the hose line from the ims fuel cap. Picture 7 8. Now the tank should be free and now it's time to remove the fuel pump by using an allen wrench to loosen the small allen screws around the fuel pump. Take the fuel pump bracket off and the fuel pump should be easy to pull out. Now take off the stock fuel pump rubber gasket and install the new gasket ims provided. Make sure the new gasket is firmly seated. Install the new fuel pump and make sure the fuel pump fuel line nipple is pointed towards the front of the tank. Put the bracket back on and put in the small allen screws. From the old stock tank take off the mounting brackets at the top of the tank and the bottom of the tank and install them to the ims tank. picture of fuel pump mounted on ims tank 9. Connect the fuel lines and electric connector and seat the tank normally on the bike, but don't tighten the tank mounting bolts back on since we are going to test and look for leaks and might have to take off the tank again. Start pouring a small amount of gas in the new ims tank without mounting the tank securely. I didn't fill it up fully; maybe just 1/4 of a gallon. Examine the area around the gasket to make sure fuel is not leaking. I waited an hour to see if any fuel started to leak before I started to put everything back together. 10. If everything looks good I started to put the metal plates on the side of the tank. These are the plates the front side fairings slide on that IMS provided. On the right side of the bike I had to bend the plate a little (towards me) since it was a little too flush with the tank and wouldn't let the fairing tab slide in. picture 10 Now everything should be back together and now you can enjoy your bike much longer between fuel ups!
Last edited by BoredAzHell20 on Tue Jul 19, 2011 11:34 pm; edited 2 times in total | |
| | | | GusinCA

| | Subject: Re: DIY IMS 3.1 Gas tank installing Sat Jul 16, 2011 8:39 pm | |
| You have a California model. I had the same thing and installed the same tank.
The hose leads down to the fuel vapor absorption canister.
Now, if you want to stay legal, you connect the hose that comes out of the top of the fill cap to that hose. Then the vapors go down the hose into the canister, and when you start the bike, it sucks the vapors back into the fuel injection system and burnes them in the engine. | |
| | | | BoredAzHell20
| | Subject: Re: DIY IMS 3.1 Gas tank installing Sun Jul 17, 2011 7:49 pm | |
| Awesome. Thanks man. I just left the hose out. Now I have a flat rear tire to deal with. =( | |
| | | | GusinCA
| | Subject: Re: DIY IMS 3.1 Gas tank installing Sun Jul 17, 2011 9:13 pm | |
| For that I highly recommend the Michelin Ultra Heavy Duty tubes. They're heavy, but at 3mm thickness I have never, ever had a flat with one. | |
| | | | BoredAzHell20
| | Subject: Re: DIY IMS 3.1 Gas tank installing Sun Jul 17, 2011 10:20 pm | |
| Your a god... I was just thinking to myself if there were more heavy duty tubes... you just blew my mind. lol | |
| | | | GusinCA
| | Subject: Re: DIY IMS 3.1 Gas tank installing Sun Jul 17, 2011 10:48 pm | |
| They are pricey, but changing tubes is such a PIA (and impossible when it's raining) that I think they're worth it.
And for tires I can't imagine a better one than the Michelin AC10 street legal knobby. Amazing off road, and totally progressive on road (that is, they lose grip so slowly and predictably it's like riding on hard pack dirt). | |
| | | | GsVs
| | Subject: install pics Mon Jul 18, 2011 6:32 am | |
| Hey Bored ...
Post some pictures once your install is complete ...
Thanks .. | |
| | | | GusinCA
| | Subject: Re: DIY IMS 3.1 Gas tank installing Mon Jul 18, 2011 10:55 am | |
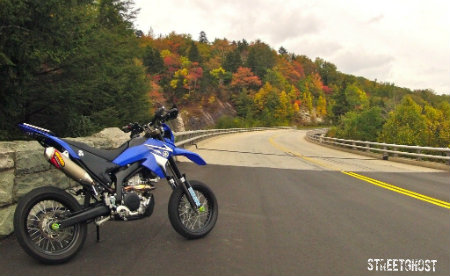
| Here's some of mine: 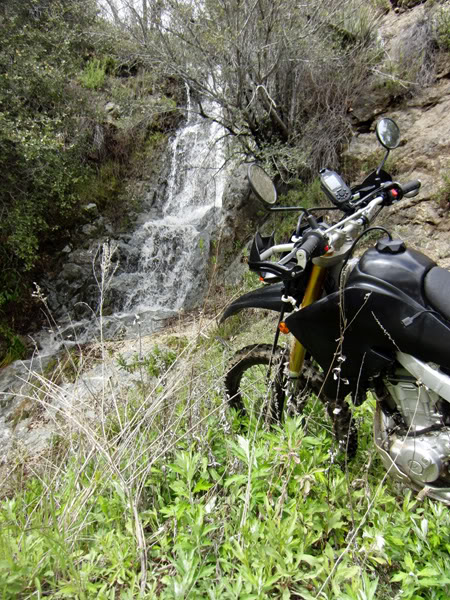 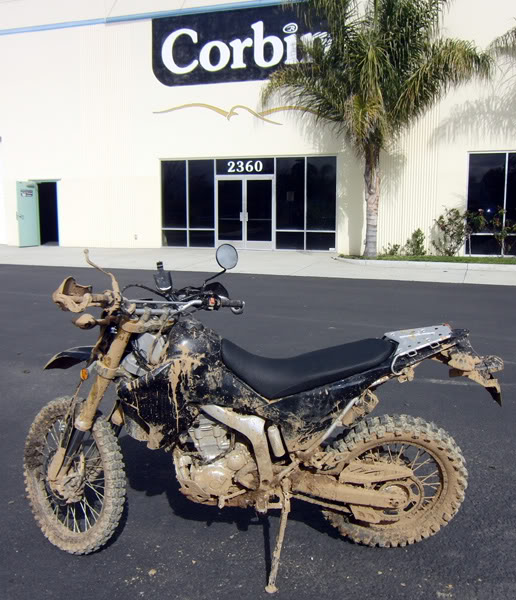  I love the range, especially since I went 3 teeth up on my rear sprocket. :) | |
| | | | BoredAzHell20
| | Subject: Re: DIY IMS 3.1 Gas tank installing Mon Jul 18, 2011 12:21 pm | |
| - GsVs wrote:
- Hey Bored ...
Post some pictures once your install is complete ...
Thanks .. Do you want me to post pictures as a DIY or you just wanted to see what tank looks like on the bike? | |
| | | | BoredAzHell20
| | | | | GsVs
| | Subject: Re: DIY IMS 3.1 Gas tank installing Tue Jul 19, 2011 6:34 am | |
| - BoredAzHell20 wrote:
- GsVs wrote:
- Hey Bored ...
Post some pictures once your install is complete ...
Thanks ..
Well here are pictures of the tank once it was installed.

If you want some how-to pictures let me know. Hey Bored ... Thanks for the pics, looks great on your X  .... If you get time -- DIY pics would be nice, I'm sure it would help others as well | |
| | | | GusinCA
| | Subject: Re: DIY IMS 3.1 Gas tank installing Tue Jul 19, 2011 10:52 am | |
| It does look good.
How Ninja would it be if they had made a black motor/case, and the black frame/shock/swingarm/wheels of the X, and the black plastics of the 2009 X? That would be one dark bike. Special forces would buy them all.
| |
| | | | BoredAzHell20
| | Subject: Re: DIY IMS 3.1 Gas tank installing Tue Jul 19, 2011 11:45 pm | |
| [quote="GsVs"][quote="BoredAzHell20"] - GsVs wrote:
- Hey Bored ...
Hey Bored ...
Thanks for the pics, looks great on your X
.... If you get time -- DIY pics would be nice, I'm sure it would help others as well Ask, and Ye shall receive. Already changed the original post to a DIY for the ims tank. HOpe it helps you out. let me know if you have any questions. | |
| | | | FG250WRR

| | | | | FG250WRR
| | Subject: Re: DIY IMS 3.1 Gas tank installing Mon Dec 12, 2011 10:49 am | |
| - BoredAzHell20 wrote:
- Hello,
So I changed this thread to a DIY on how to install a 3 gallon IMS tank. I guess it would be more helpful then the original post of, "where does this hose goes to." post (STEP 7 ON DIY) .
First ride the bike till the fuel light comes on. Less gas in the tank the better.
1. You will need to remove the seat by removing the two allen bolts under the tail of the seat. picture 1
2. Go to the side front fairings and removed the two allen screws in the front picture 2
3. You will need to unscrew the phillips head screw circled in yellow (underseat) and pull the fairing out (towards you) circled in red.
After you have these off pull the fairing towards the front wheel and it should slide off easily. picture 3
NOW REPEAT STEPS 2 & 3 FOR THE OTHER SIDE FAIRINGS
4. Unscrew the tank mount allen bolts. One on top near handle bars and two at the base of the tank. top and bottom
I know the pictures i have is a tank off the bike already, but you get the idea.
5. Remove the electric plug on the bottom of the fuel pump. Circled in yellow is the lever you will need to push to release the plug. picture 5
6. Next remove the fuel line to the fuel filter. First I pulled the fuel line out as far as it can go on the nipple then i started to work on the safety clip (orange clip). This will give you room to slide the safety clip off.
Remove the orange safety (circled in yellow) clip by releasing the side clips and moving it back. Once that is out of the way, pinch the fuel line at the blue release tabs (circled in red) and pull away from the nipple of the fuel pump.
The picture I have is the safety clip already unmounted and about to pull off the fuel line. PIcture 6
7. If you have a california model bike you will have an additional hose connected to the side of the tank stock tank. Remove this hose. You do not have to re-attach it when you install the new ims tank, but to meet california emissions you can hook up ims gas cap hose to this line.
This picture shows the hose that has no home unless you re-attached it to the hose line from the ims fuel cap. Picture 7
8. Now the tank should be free and now it's time to remove the fuel pump by using an allen wrench to loosen the small allen screws around the fuel pump. Take the fuel pump bracket off and the fuel pump should be easy to pull out.
Now take off the stock fuel pump rubber gasket and install the new gasket ims provided. Make sure the new gasket is firmly seated.
Install the new fuel pump and make sure the fuel pump fuel line nipple is pointed towards the front of the tank. Put the bracket back on and put in the small allen screws.
From the old stock tank take off the mounting brackets at the top of the tank and the bottom of the tank and install them to the ims tank. picture of fuel pump mounted on ims tank
9. Connect the fuel lines and electric connector and seat the tank normally on the bike, but don't tighten the tank mounting bolts back on since we are going to test and look for leaks and might have to take off the tank again.
Start pouring a small amount of gas in the new ims tank without mounting the tank securely. I didn't fill it up fully; maybe just 1/4 of a gallon. Examine the area around the gasket to make sure fuel is not leaking. I waited an hour to see if any fuel started to leak before I started to put everything back together.
10. If everything looks good I started to put the metal plates on the side of the tank. These are the plates the front side fairings slide on that IMS provided. On the right side of the bike I had to bend the plate a little (towards me) since it was a little too flush with the tank and wouldn't let the fairing tab slide in.
picture 10
Now everything should be back together and now you can enjoy your bike much longer between fuel ups! Hi, i will install the same ,but i'm wondering if you have re-instal the ppermanent sticker against heat past in the tank (sticker silver) ? | |
| | | | FG250WRR
| | Subject: Re: DIY IMS 3.1 Gas tank installing Mon Dec 12, 2011 11:09 am | |
| | |
| | | | GusinCA
| | Subject: Re: DIY IMS 3.1 Gas tank installing Mon Dec 12, 2011 11:25 am | |
| First of all, how did you get so many bikes! :)
Yes, the Corbin lowers the seat slightly (1.5 inches) and feels really amazing, since there are no seams.
However, for the Corbin to fit with the bigger tank, I had to bring the bike to Corbin here in California. That is easy for me, a 4 hour drive, but not so much for you... :) | |
| | | | FG250WRR
| | Subject: Re: DIY IMS 3.1 Gas tank installing Mon Dec 12, 2011 11:32 am | |
| - GusinCA wrote:
- First of all, how did you get so many bikes! :)
Yes, the Corbin lowers the seat slightly (1.5 inches) and feels really amazing, since there are no seams.
However, for the Corbin to fit with the bigger tank, I had to bring the bike to Corbin here in California. That is easy for me, a 4 hour drive, but not so much for you... :) Because i'm a old man 47 :) Interesting wath you said about corbin,because maybe now they get an exemple of the seat for the mod of the ims 3gl tank....Because i wpuld like order one but if you tell me that they modified.......as you see i'm in france Do you think that they stiill get the data modif for ims 3gl | |
| | | | GusinCA
| | Subject: Re: DIY IMS 3.1 Gas tank installing Mon Dec 12, 2011 11:52 am | |
| You'd have to call them, and see if they remember modifying my seat. Or perhaps I can help you next time I am up there, but if might be 3-8 months before I bring my bike there again? Then I can have it modified to fit my bike, and then ship it to you myself? By the way, I'm 41, but I have some other Yamaha toys too... :)  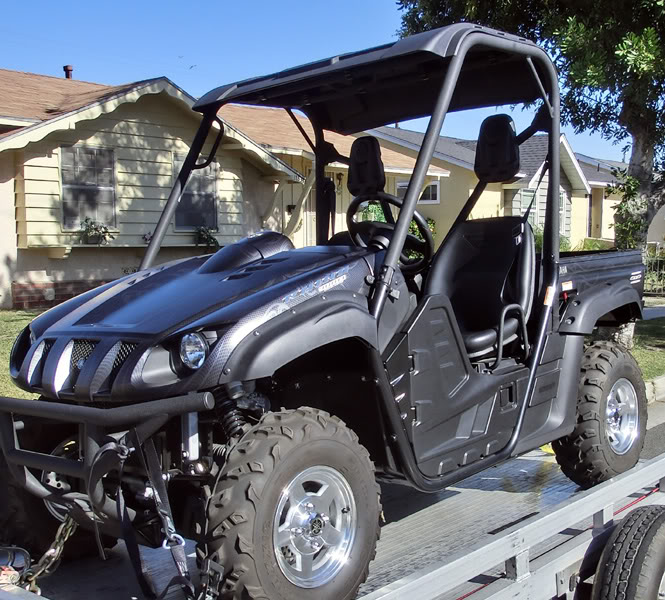 | |
| | | | FG250WRR
| | Subject: Re: DIY IMS 3.1 Gas tank installing Mon Dec 12, 2011 12:08 pm | |
| - GusinCA wrote:
- You'd have to call them, and see if they remember modifying my seat.
Or perhaps I can help you next time I am up there, but if might be 3-8 months before I bring my bike there again? Then I can have it modified to fit my bike, and then ship it to you myself?
By the way, I'm 41, but I have some other Yamaha toys too... :)
tks for your reply  Don't make mistake i keeped only the 250 R² and the 600 TTR, rest are sold For the seat i will try to call them last summer i was in california too but only for trip with my family wife+2 daughter 13 and 17 ), LA /LV/SF/LV with arental car jeep laredo 3.7 What a crazy country, i'v really love it and i was so impress of the quality of life and kindness of people:always ready to help you, no stress in shop, people very polite, French have a lot of to learn about ,believe me......  wild and various landscape,amaizingd It have changed completly my point of view about USA Now i'm in love with this country,i will put a flap on my window ! Nice toys you got ,i get my see licence but no boat ! | |
| | | | GusinCA
| | Subject: Re: DIY IMS 3.1 Gas tank installing Mon Dec 12, 2011 12:38 pm | |
| I've been to France many times, and I love it there. My favorite is Austria. If the weather were as nice in Salzburg as it is in Newport Beach, maybe I would live there... :)
Call them and give them my name: Gustav Chyba
Maybe they remember modifying my seat, they did it for free.
And if that does not work, maybe you can pay for my gas to bring my bike up there and your seat so they can modify it.
Or maybe you just fly to San Francisco, and I bring my Rhino and my WR250R and we go to Hollister and go riding. Hollister has some of the best single track riding in California... | |
| | | | FG250WRR
| | Subject: Re: DIY IMS 3.1 Gas tank installing Mon Dec 12, 2011 1:21 pm | |
| - GusinCA wrote:
- I've been to France many times, and I love it there. My favorite is Austria. If the weather were as nice in Salzburg as it is in Newport Beach, maybe I would live there... :)
Call them and give them my name: Gustav Chyba
Maybe they remember modifying my seat, they did it for free.
And if that does not work, maybe you can pay for my gas to bring my bike up there and your seat so they can modify it.
Or maybe you just fly to San Francisco, and I bring my Rhino and my WR250R and we go to Hollister and go riding. Hollister has some of the best single track riding in California... Yes maybe i will do your solution when i will get my tank and installed,i will send all money needing keep in touch for that Thanks you for invitation because of course come back in california will be a real dream for me ,you can't imagine how many when i was in my rental car i was thinking "oh here it will be fabulous withj the bike,no here ,no here, etc.... but next trip planed for summer (july) it's bali in far east. But california it's still here....really | |
| | | | FG250WRR
| | Subject: Re: DIY IMS 3.1 Gas tank installing Mon Dec 12, 2011 1:27 pm | |
| - GusinCA wrote:
- I've been to France many times, and I love it there. My favorite is Austria. If the weather were as nice in Salzburg as it is in Newport Beach, maybe I would live there... :)
Call them and give them my name: Gustav Chyba
Maybe they remember modifying my seat, they did it for free.
And if that does not work, maybe you can pay for my gas to bring my bike up there and your seat so they can modify it.
Or maybe you just fly to San Francisco, and I bring my Rhino and my WR250R and we go to Hollister and go riding. Hollister has some of the best single track riding in California... To come back to my question "Hi, i will install the same ,but i'm wondering if you have re-instal the ppermanent sticker against heat past in the tank (sticker silver) ? " | |
| | | | GusinCA
| | Subject: Re: DIY IMS 3.1 Gas tank installing Mon Dec 12, 2011 2:18 pm | |
| No, I don't think so. I just installed the tank the way it came. You'll have to call IMS on that one... | |
| | | | FG250WRR
| | Subject: Re: DIY IMS 3.1 Gas tank installing Mon Dec 12, 2011 4:22 pm | |
| - GusinCA wrote:
- No, I don't think so. I just installed the tank the way it came. You'll have to call IMS on that one...
when i will get the tank i will follow your DIY letter by letter i'm always impress by people wich are able to explain clearly and take the time to do it and for free only to contribute to help unknow people,but MAYBE IT4S THAT a community , fan of R² Thanks for your help | |
| | | | Sponsored content
| | Subject: Re: DIY IMS 3.1 Gas tank installing | |
| |
| | | | | | DIY IMS 3.1 Gas tank installing | |
|
Similar topics | |
|
| | Permissions in this forum: | You cannot reply to topics in this forum
| |
| |
| |